Turn on suggestions
Auto-suggest helps you quickly narrow down your search results by suggesting possible matches as you type.
Showing results for
- Good Sam Community
- Groups
- Travel Trailer Group
- Forum
- Rebuilding "Ms. Merry" The Amerigo - Updated 05/29...
Options
- Subscribe to RSS Feed
- Mark Topic as New
- Mark Topic as Read
- Float this Topic for Current User
- Bookmark
- Subscribe
- Mute
- Printer Friendly Page
Rebuilding "Ms. Merry" The Amerigo - Updated 05/29/2021
Options
- Mark as New
- Bookmark
- Subscribe
- Mute
- Subscribe to RSS Feed
- Permalink
- Report Inappropriate Content
Jun-30-2016 01:56 AM
Once upon a time, I used to break up my Trip Reports and Projects into separate posts, at the time this was heavily "suggested" to me by a former admin.
Going forward, I think it may actually be more prudent to return to more of Sleepy's style, where new stuff is added as replies and a table of contents is kept in the main first post.
So, from here on out, I will be posting any further work on the Ms. Merry the Amerigo, here vs creating a couple hundred separate posts that might get missed.
I'll link to the separate posts that currently make up chapters prior to this one, for those that are just getting started instead of duplicating these posts.
----------------------------------------------------------------------
Table of Contents
Since I need to work on fixing the blog portal, I've been doing some video progress ports on my Youtube channel to catch folks up till I can get back to writing blog entries :).
Video Progress Report Updates
Going forward, I think it may actually be more prudent to return to more of Sleepy's style, where new stuff is added as replies and a table of contents is kept in the main first post.
So, from here on out, I will be posting any further work on the Ms. Merry the Amerigo, here vs creating a couple hundred separate posts that might get missed.
I'll link to the separate posts that currently make up chapters prior to this one, for those that are just getting started instead of duplicating these posts.
----------------------------------------------------------------------
Table of Contents
- Chapter 1 - Tale of Two Truck Campers
- Chapter 2 - Of Pirates & Truck Campers
- Chapter 3 - Just Call me the Demolition Man!
- Chapter 4 - Rebuilding the Passenger-Side Wing
- Chapter 5 - Repairing the Rear Corner on the Passenger Side
- Chapter 6 - More work on the Cabover Bed
- Chapter 7 - Haven't we been here before?....
- Chapter 8 - Close her up and install the other rear jack
- Chapter 9 - Tale of Two Tanks
- Chapter 10 - The Mystery of the Trampoline Floor
- Chapter 11 - Enclosing our first wall!
- Chapter 12 - Merry gets a step up!
- Chapter 13 - Taking the bow out of the cabover
- Chapter 14 - Ms. Merry Lights up the Night!
- Chapter 15 - Completing the Cabover - Part 1
- Chapter 16 - Completing the Cabover - Part 2
- Chapter 17 - The last Demo, Clearing the Bathroom–Part 1
- Chapter 18 - Merry Raises the Roof–Part 1
- Chapter 19 - Merry Raises the Roof–Part 2
- Chapter 20 - The Mystery of the Trampoline Floor-Part 2
- Chapter 21 - The Mystery of the Trampoline Floor-Part 3
- Chapter 22 - Merry gets a step up!
- Chapter 23 - Merry Glues it up!
- Chapter 24 - The new Loo – Part 1
- Chapter 25 - On all four feet, again
- Chapter 26 - Oh, the Progress we have Made!
- Chapter 27 - Merry goes to the wall! - Part 1
- Chapter 28 - Merry goes to the wall! - Part 2
- Chapter 29 - The new Loo – Part 2
- Chapter 30 - the Story of the Flimsy bed – Part 1
- Chapter 31 - the Story of the Flimsy bed – Part 2
- Chapter 32 - the Story of the Flimsy bed – Part 3
- Chapter 33 - the Story of the Flimsy bed – Part 4
Since I need to work on fixing the blog portal, I've been doing some video progress ports on my Youtube channel to catch folks up till I can get back to writing blog entries :).
Video Progress Report Updates
- October 2020
- April 2021
- May 2021 - Added 5/29/2021
My Blog - The Journey of the Redneck Express
'1992 Dodge W-250 "Dually" Power Wagon - Club Cab Long Bed 4x4 V8 5.9L gashog w/4.10 Geared axles
'1974 KIT Kamper 1106 - 11' Slide-in
'2006 Heartland BigHorn 3400RL
CB
Channel 17Redneck Express
'1992 Dodge W-250 "Dually" Power Wagon - Club Cab Long Bed 4x4 V8 5.9L gashog w/4.10 Geared axles
'1974 KIT Kamper 1106 - 11' Slide-in
'2006 Heartland BigHorn 3400RL
Labels:
- Labels:
-
Truck Campers
65 REPLIES 65
Options
- Mark as New
- Bookmark
- Subscribe
- Mute
- Subscribe to RSS Feed
- Permalink
- Report Inappropriate Content
May-31-2021 01:25 AM
notsobigjoe wrote:
Very nice so far. You need a good solid two week vacation and the help of a teenager and your on your way. I just totally rebuilt my 1988 Bayliner Capri. It took me two years after work and sold it for four thousand dollars. LOL I get bored really easy.... It looks great Joe.
This marks the sixth year I've been working on Ms.Merry, though prior to this year I was only able to really work on it four months out of the year.
This year, it's been every evening after work from 7/8pm till 10:30pm and pretty much the whole days of the weekends.
My Blog - The Journey of the Redneck Express
'1992 Dodge W-250 "Dually" Power Wagon - Club Cab Long Bed 4x4 V8 5.9L gashog w/4.10 Geared axles
'1974 KIT Kamper 1106 - 11' Slide-in
'2006 Heartland BigHorn 3400RL
CB
Channel 17Redneck Express
'1992 Dodge W-250 "Dually" Power Wagon - Club Cab Long Bed 4x4 V8 5.9L gashog w/4.10 Geared axles
'1974 KIT Kamper 1106 - 11' Slide-in
'2006 Heartland BigHorn 3400RL
Options
- Mark as New
- Bookmark
- Subscribe
- Mute
- Subscribe to RSS Feed
- Permalink
- Report Inappropriate Content
May-30-2021 10:14 AM
Very nice so far. You need a good solid two week vacation and the help of a teenager and your on your way. I just totally rebuilt my 1988 Bayliner Capri. It took me two years after work and sold it for four thousand dollars. LOL I get bored really easy.... It looks great Joe.
Options
- Mark as New
- Bookmark
- Subscribe
- Mute
- Subscribe to RSS Feed
- Permalink
- Report Inappropriate Content
May-29-2021 07:53 PM
Time for the monthly progress report video :). My apologies, I am the most boring person to listen to in the world :p.
May 2021 - Ms. Merry the Amerigo Remodel Update
This go round, we're covering the completion of the water system and its testing, the successful testing of the gas system, completion of the main electrical system, the fridge compartment work, and many other things :).
May 2021 - Ms. Merry the Amerigo Remodel Update
This go round, we're covering the completion of the water system and its testing, the successful testing of the gas system, completion of the main electrical system, the fridge compartment work, and many other things :).
My Blog - The Journey of the Redneck Express
'1992 Dodge W-250 "Dually" Power Wagon - Club Cab Long Bed 4x4 V8 5.9L gashog w/4.10 Geared axles
'1974 KIT Kamper 1106 - 11' Slide-in
'2006 Heartland BigHorn 3400RL
CB
Channel 17Redneck Express
'1992 Dodge W-250 "Dually" Power Wagon - Club Cab Long Bed 4x4 V8 5.9L gashog w/4.10 Geared axles
'1974 KIT Kamper 1106 - 11' Slide-in
'2006 Heartland BigHorn 3400RL
Options
- Mark as New
- Bookmark
- Subscribe
- Mute
- Subscribe to RSS Feed
- Permalink
- Report Inappropriate Content
Apr-30-2021 05:15 PM
Quick Progress update, as I'm wayyyy behind on the blog!
April 2021 - Ms. Merry Progress Update
April 2021 - Ms. Merry Progress Update
My Blog - The Journey of the Redneck Express
'1992 Dodge W-250 "Dually" Power Wagon - Club Cab Long Bed 4x4 V8 5.9L gashog w/4.10 Geared axles
'1974 KIT Kamper 1106 - 11' Slide-in
'2006 Heartland BigHorn 3400RL
CB
Channel 17Redneck Express
'1992 Dodge W-250 "Dually" Power Wagon - Club Cab Long Bed 4x4 V8 5.9L gashog w/4.10 Geared axles
'1974 KIT Kamper 1106 - 11' Slide-in
'2006 Heartland BigHorn 3400RL
Options
- Mark as New
- Bookmark
- Subscribe
- Mute
- Subscribe to RSS Feed
- Permalink
- Report Inappropriate Content
Oct-15-2020 09:36 PM
quite the task!
Chuck & Ruth with 4-legged Molly
2007 Tiffin Allegro 30DA
2011 Ford Ranger
1987 HD FLHTP
2007 Tiffin Allegro 30DA
2011 Ford Ranger
1987 HD FLHTP
Options
- Mark as New
- Bookmark
- Subscribe
- Mute
- Subscribe to RSS Feed
- Permalink
- Report Inappropriate Content
Oct-10-2020 12:20 AM
Since I've been failing on getting updates on my progress this year onto the blog, decided to shoot a short walk-through update video to recap the progress made so far this year :).
October 2020 - Ms. Merry Update
October 2020 - Ms. Merry Update
My Blog - The Journey of the Redneck Express
'1992 Dodge W-250 "Dually" Power Wagon - Club Cab Long Bed 4x4 V8 5.9L gashog w/4.10 Geared axles
'1974 KIT Kamper 1106 - 11' Slide-in
'2006 Heartland BigHorn 3400RL
CB
Channel 17Redneck Express
'1992 Dodge W-250 "Dually" Power Wagon - Club Cab Long Bed 4x4 V8 5.9L gashog w/4.10 Geared axles
'1974 KIT Kamper 1106 - 11' Slide-in
'2006 Heartland BigHorn 3400RL
Options
- Mark as New
- Bookmark
- Subscribe
- Mute
- Subscribe to RSS Feed
- Permalink
- Report Inappropriate Content
Aug-04-2020 03:56 PM
Nice, that's going to last forever!
Chuck & Ruth with 4-legged Molly
2007 Tiffin Allegro 30DA
2011 Ford Ranger
1987 HD FLHTP
2007 Tiffin Allegro 30DA
2011 Ford Ranger
1987 HD FLHTP
Options
- Mark as New
- Bookmark
- Subscribe
- Mute
- Subscribe to RSS Feed
- Permalink
- Report Inappropriate Content
Aug-03-2020 01:13 AM
Friday, July 3, 2020
Rebuilding “Ms. Merry” the Amerigo– And the Story of the Flimsy bed–Part 4
During Part 3, I mentioned that other work was going on while the glue and fiberglass cured on Ms. Merry's new Snap-n-Nap Wings, so in Part 4, we'll cover the work going on inside Ms. Merry's Snap-N-Nap to prep for the installation of the new wing walls :).
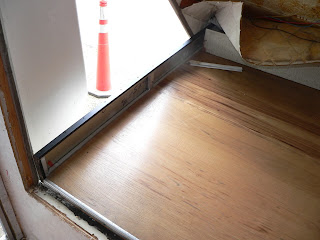
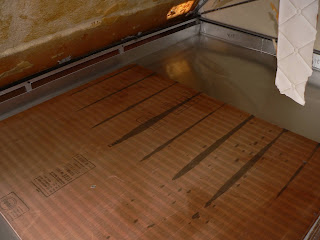
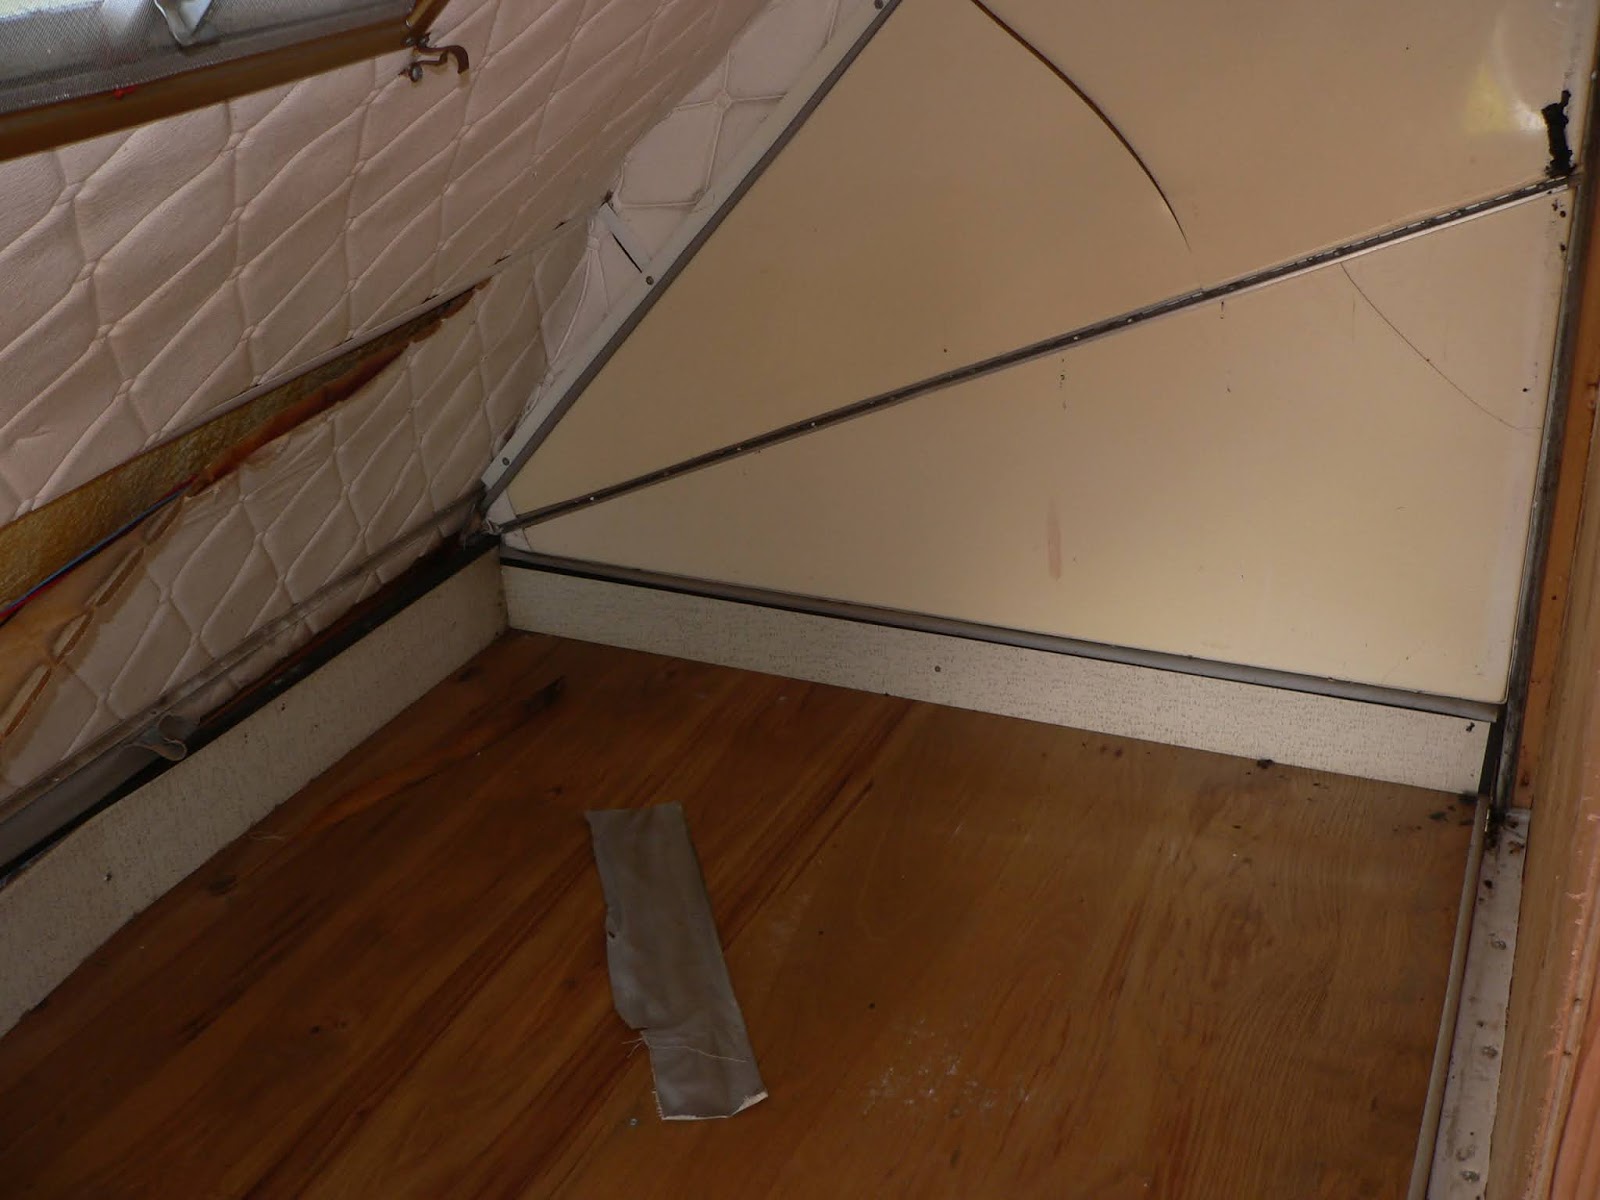
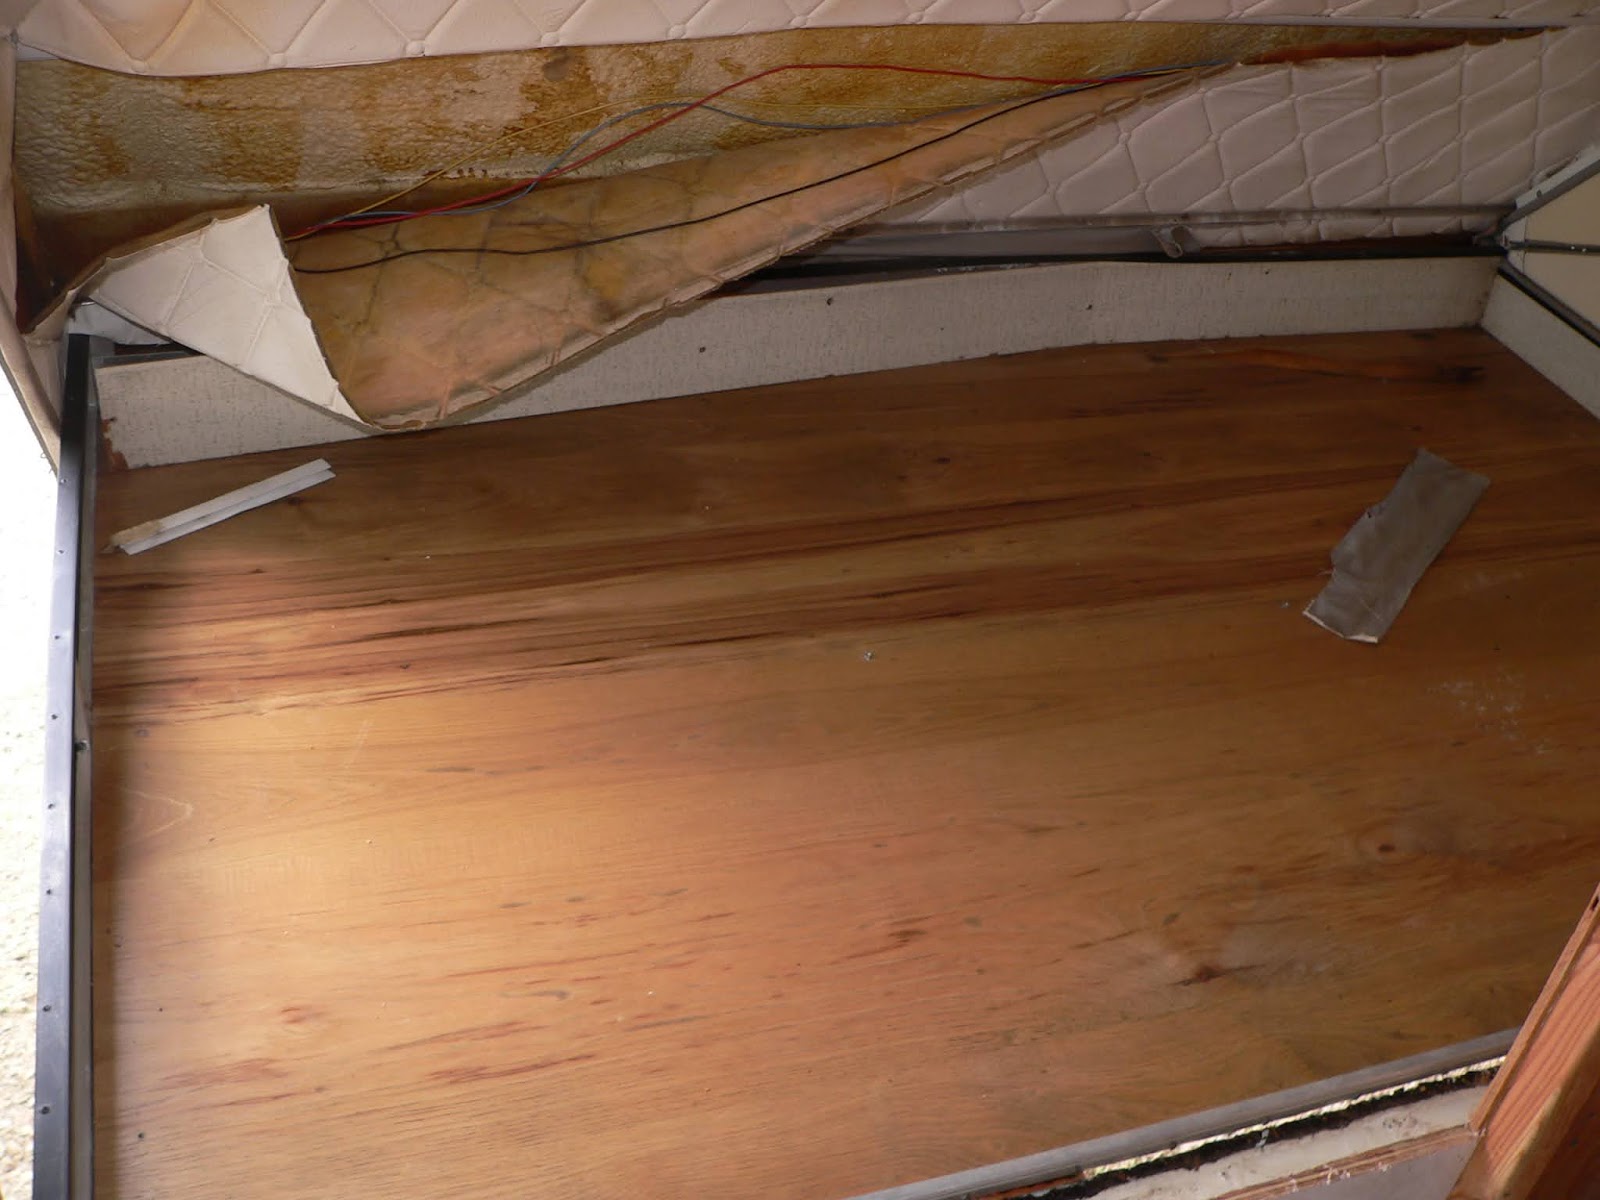
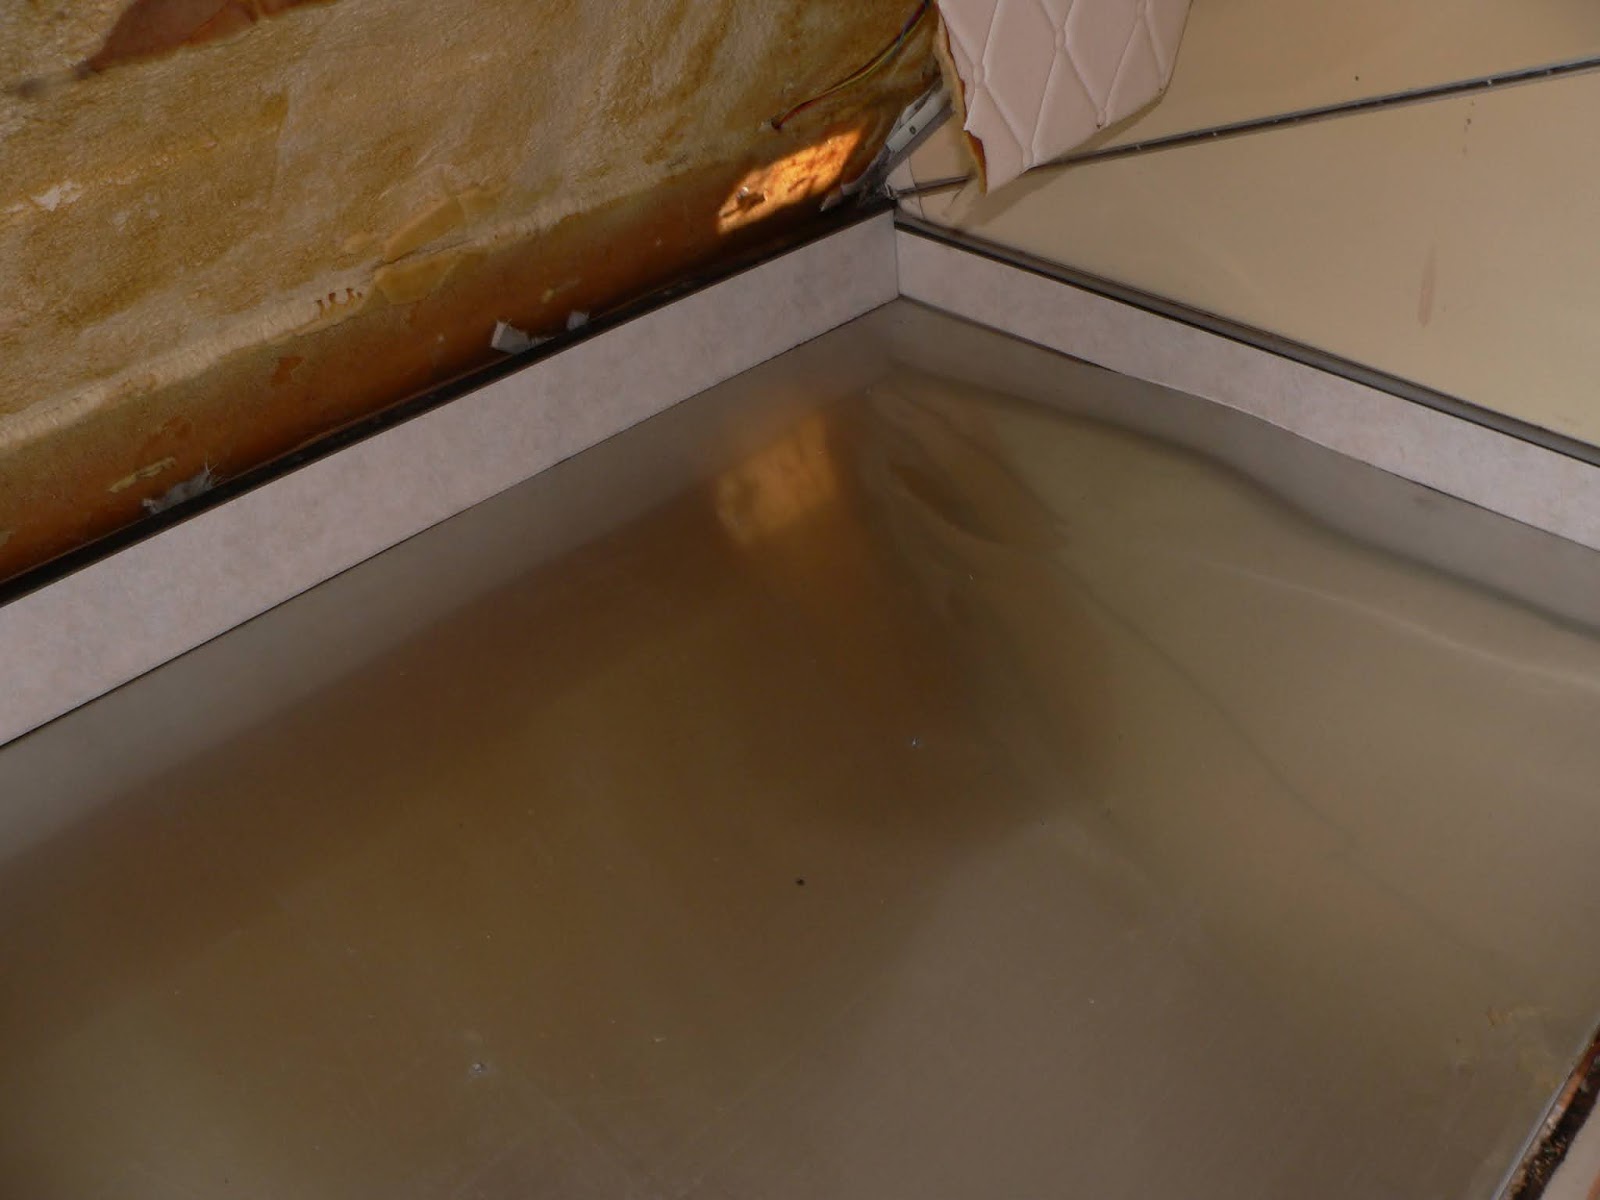
To start off, here's Merry's Snap-N-Nap Bed with the mattress finally removed! The pan wood is actually in better shape than I was expecting, given the mildew smell that this area had been hanging onto. Turns out the smell was actually coming from that nasty fabric wall covering they'd used.


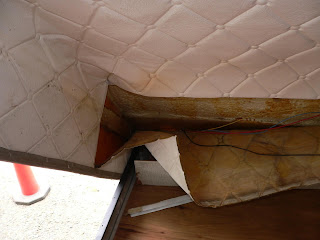
The paneling on these sides was held on with a couple small pan-head screws and a very minimal amount of adhesive, I basically just had to push a putty knife between the wood and the aluminum and popped right off.
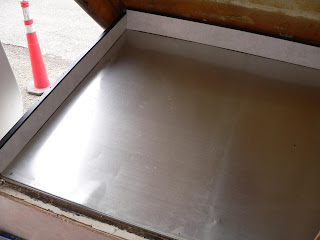
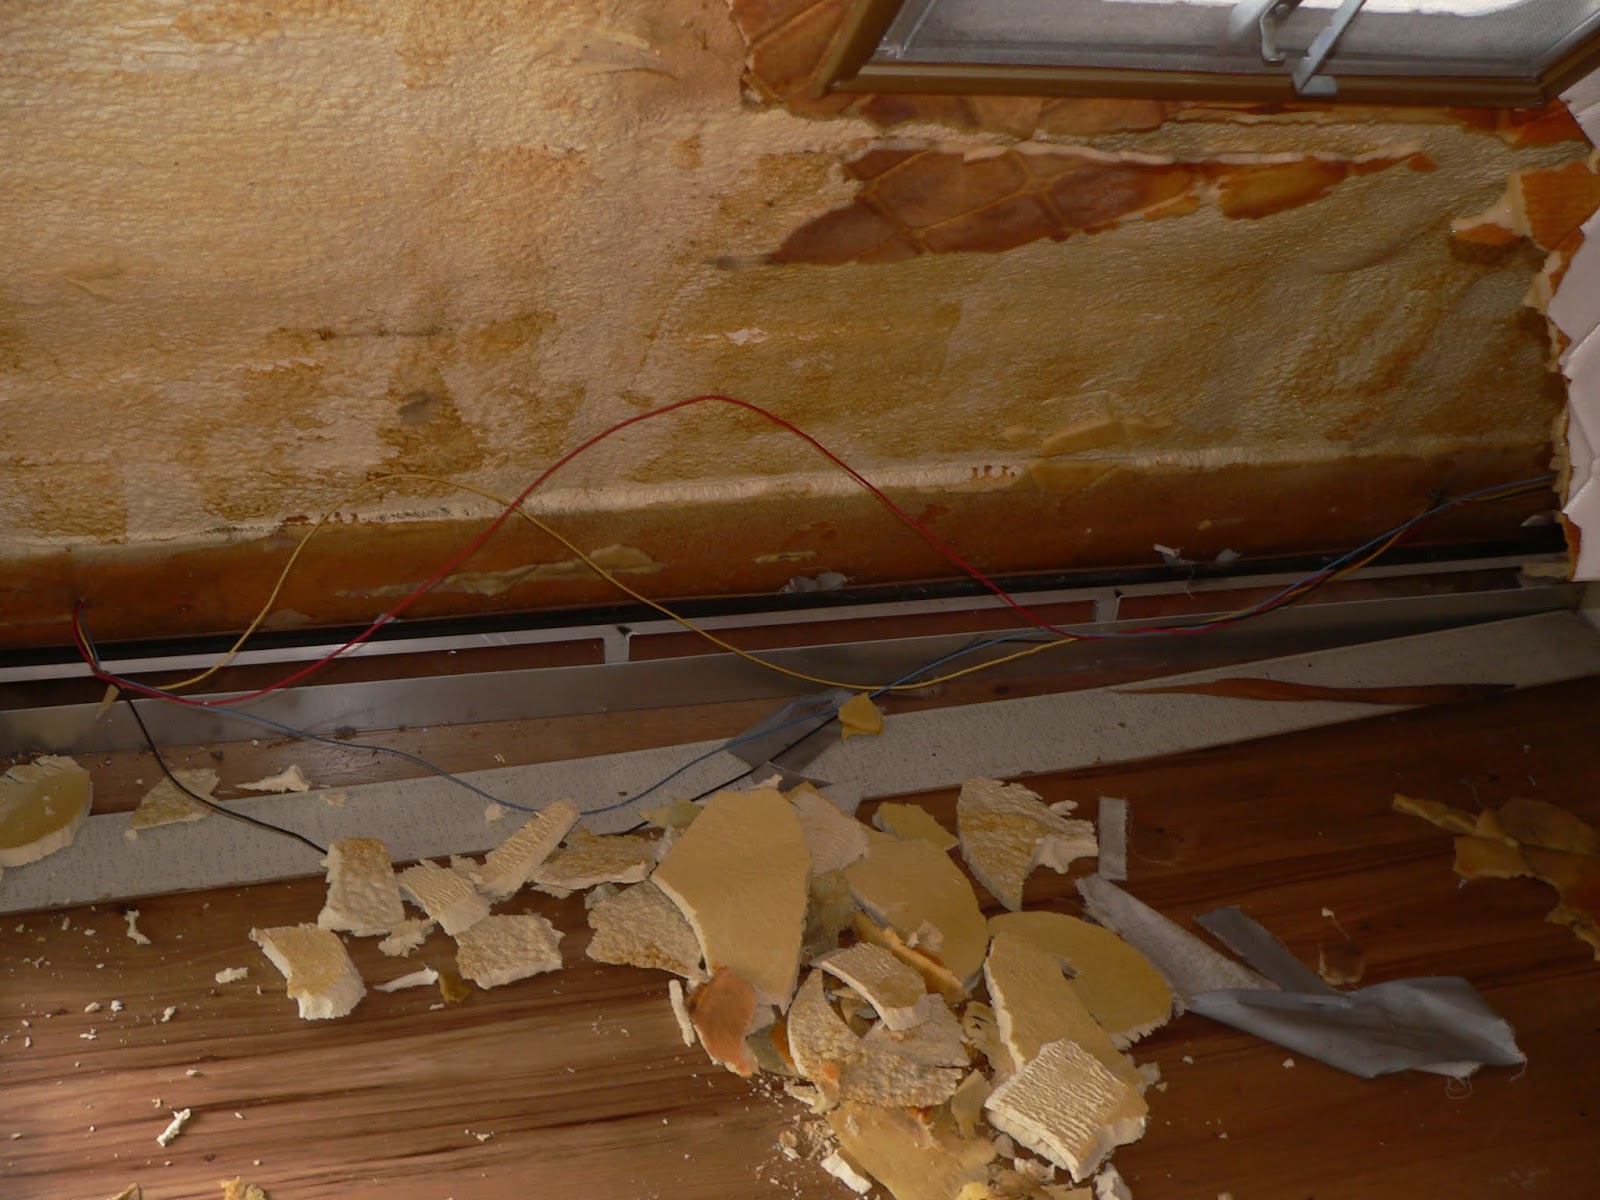
Time to start getting that nasty vinyl fabric wall mess out once and for all..... To remove it, I simply ran a box knife along the joints to cut it and pulled it out by hand. The vinyl is carpet foam backed type stuff and is only held on with spray adhesive. As I tore it off, I discovered that moisture had gotten in around the window at some point and had soaked into this nasty fabric as the back of it was stained with old mildew and mold spots.
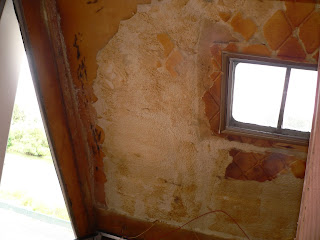
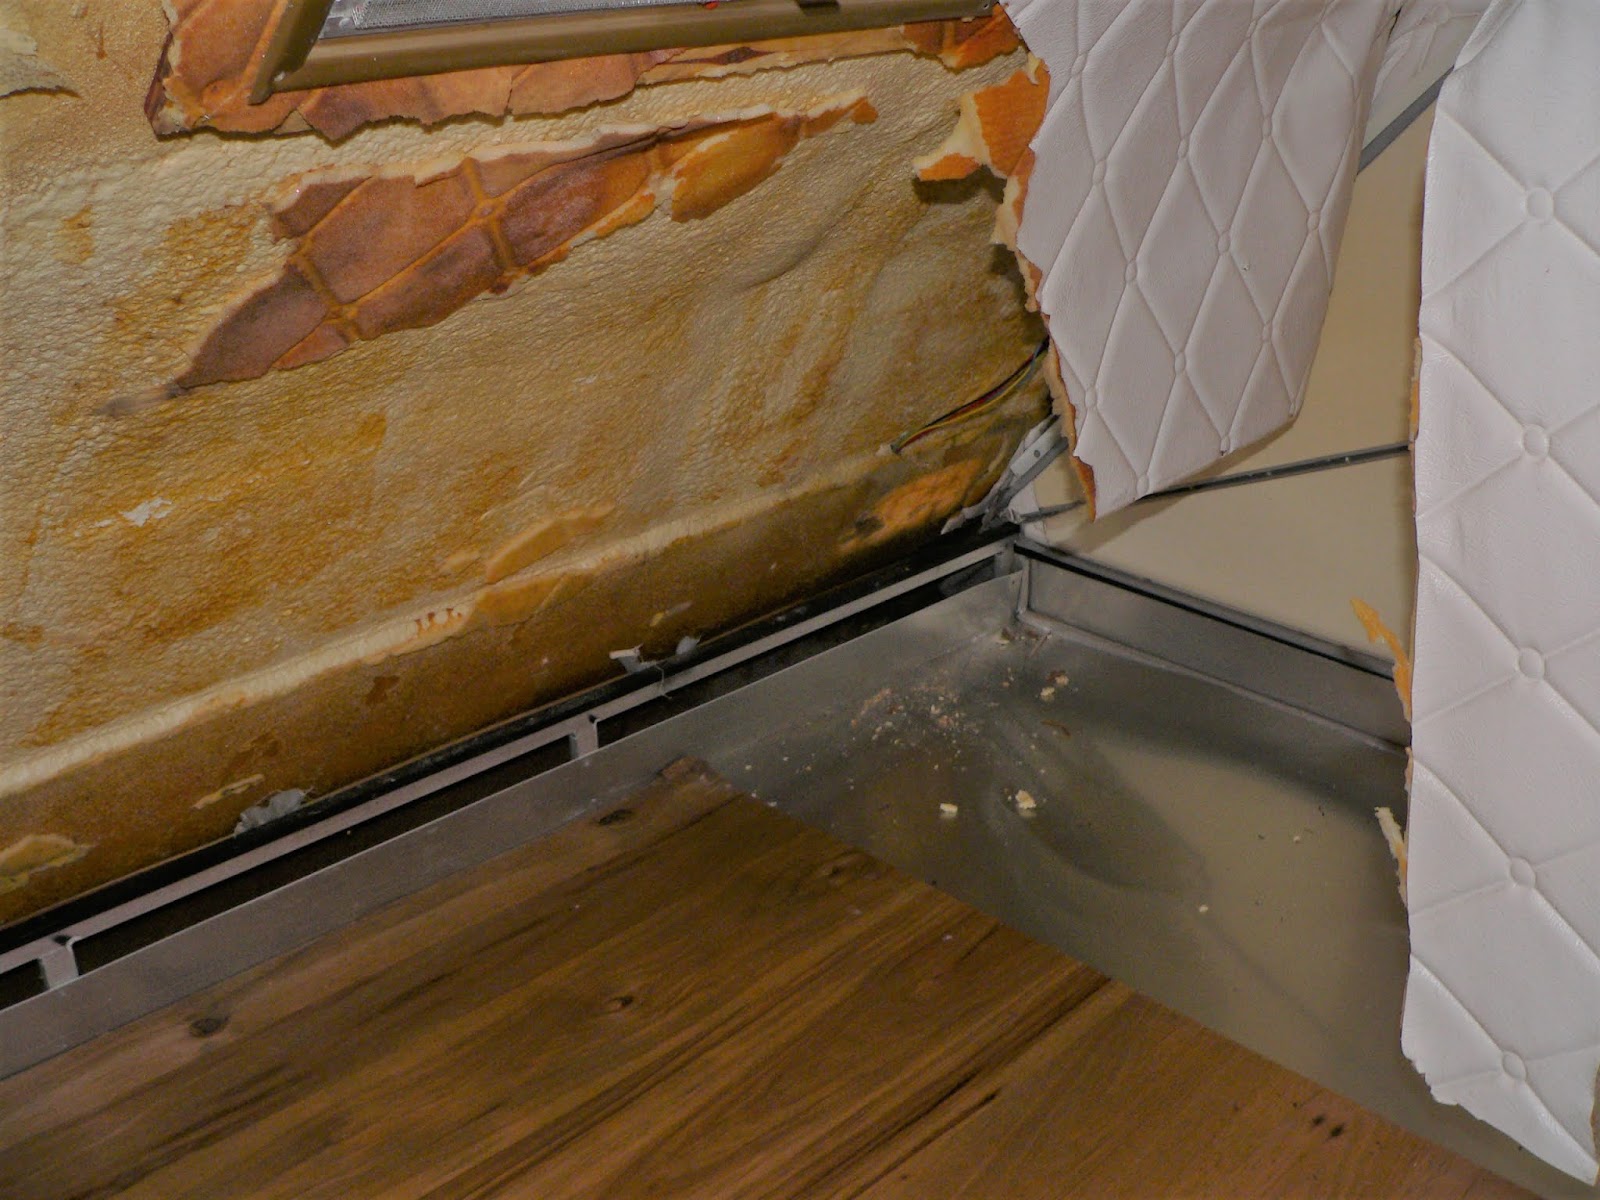
Yay.... more spray foam.....That's all going to have be scrapped off so we can come back later and install some wooden framing along the perimeter for installing proper insulation board and wall paneling later. Mercifully, a rubber mallet and a putty knife pops it off the fiberglass in nice big chunks, leaving little residue behind.

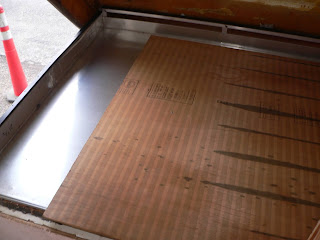
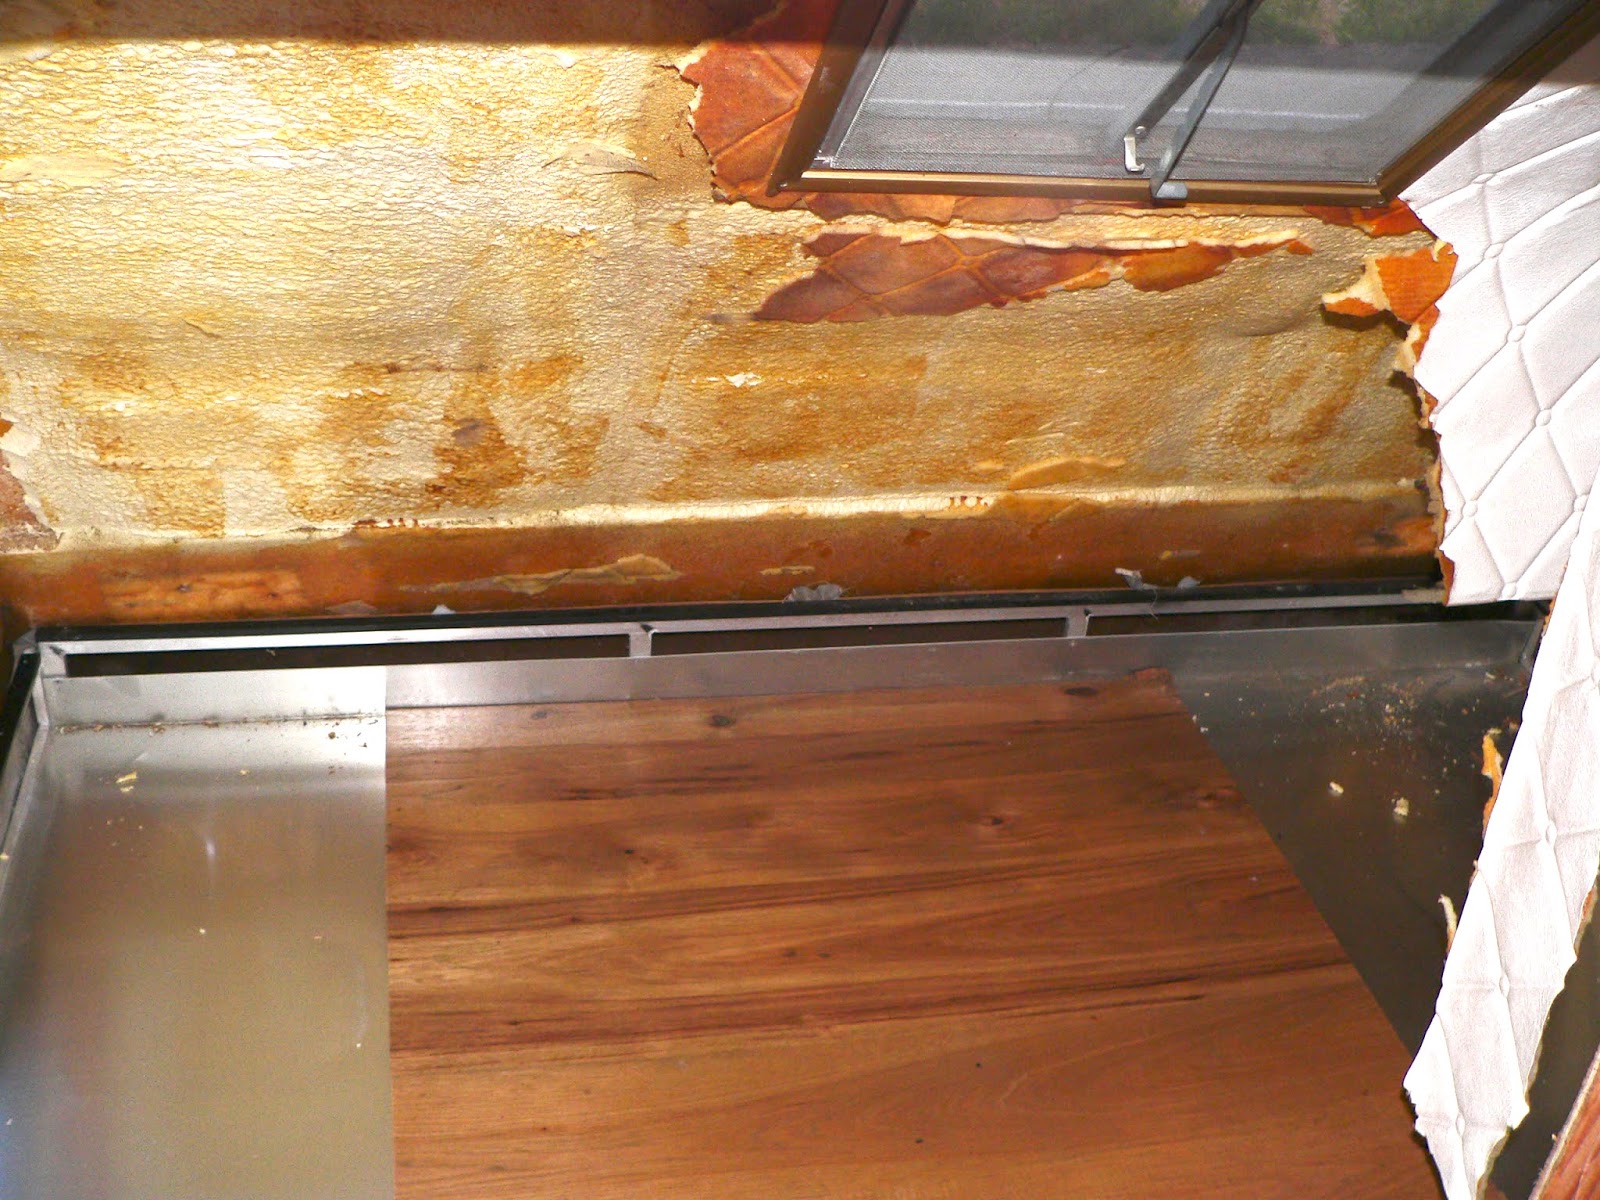
The wooden "floor", and I use that term loosely, was simply held in by two 1/4" headed hex head screws, with them removed it lifted right out. Sadly, I forgot to take a picture of the laughable 1/8" thick fiberglass insulation mat that was underneath the aluminum sheet that makes up the bed pan's outer skin and the wall paneling floor that was in place.
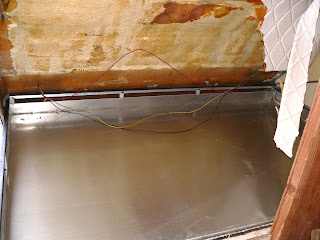
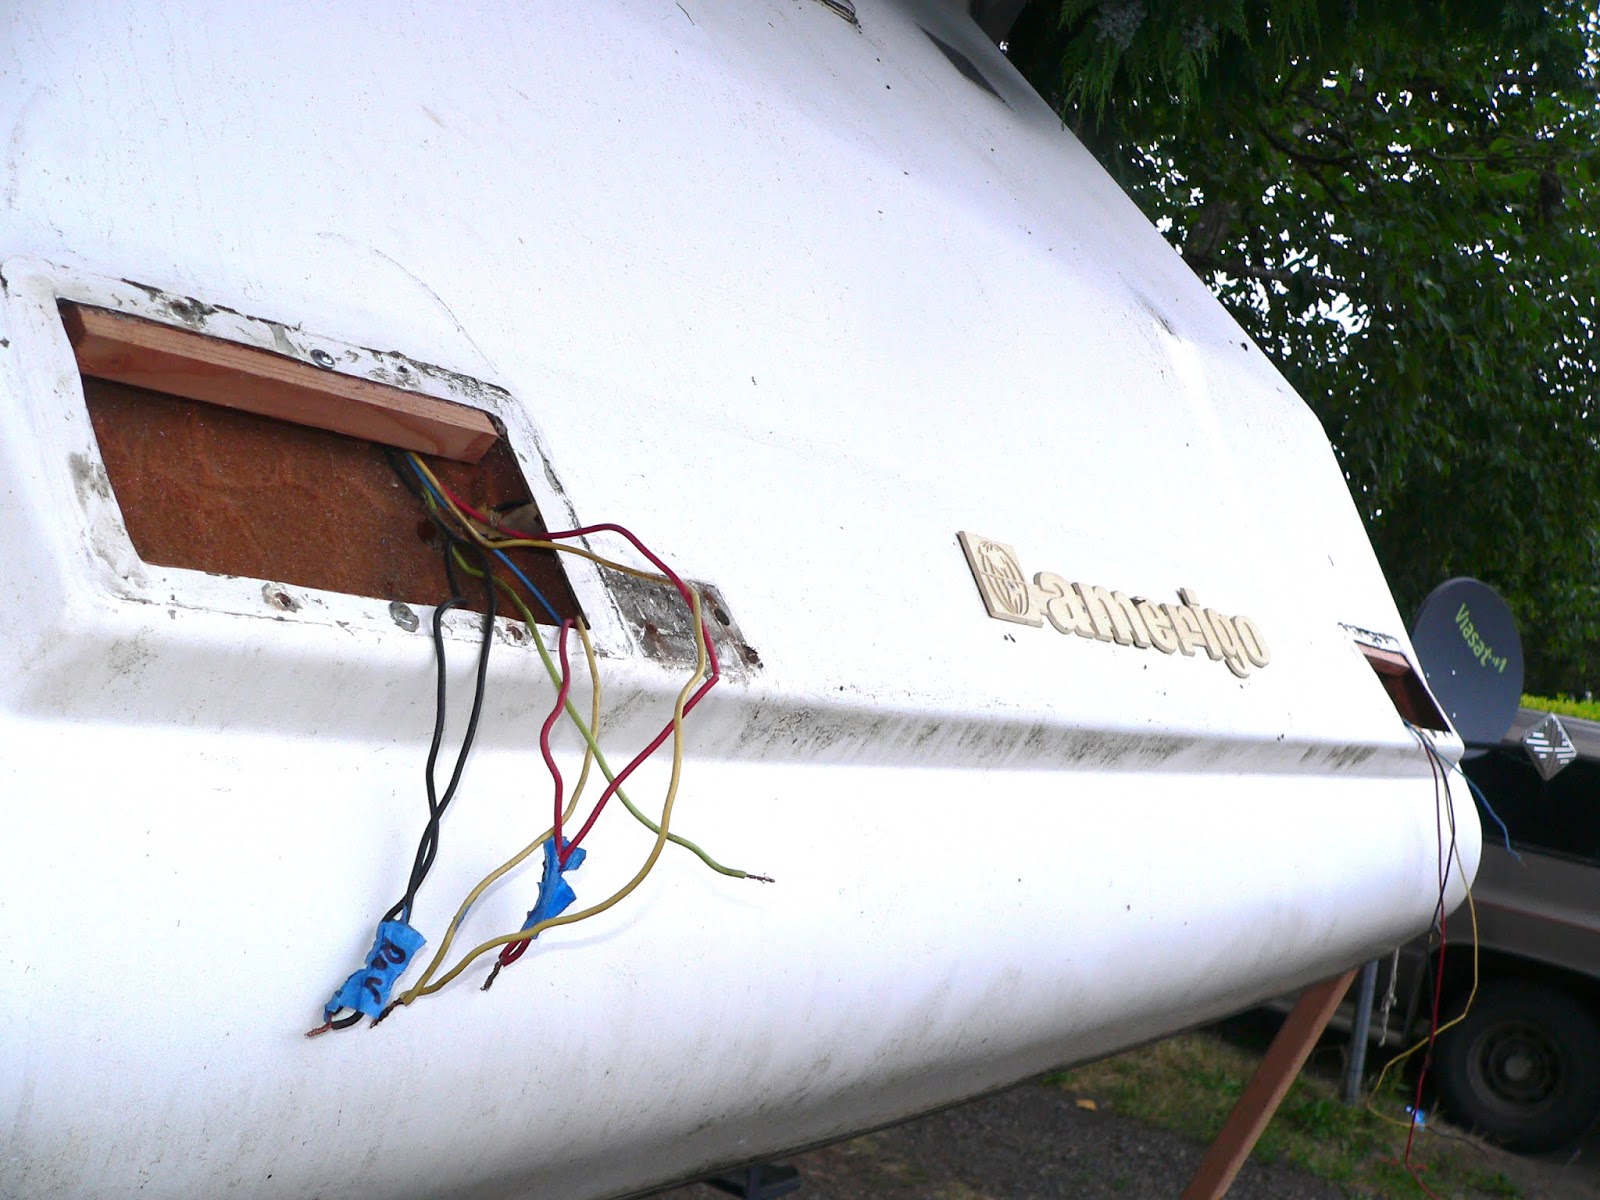
So, my next discovery of stupid was the fact that they had glued the wiring for the tail lights on the inside.... to the foam.... Which makes zero sense, because there's a nice cavity specifically for pulling wires inside of, formed into the fiberglass wall!!!

Fixing this wasn't hard, just annoying, as I had to remove the new tail lights had I installed a couple years back so I could run my fish tape through the wiring cavity and re-pull the wires like they should have been done from the factory. Also took a moment to drill a new entry hole into the top edge of the cavity so that the wires going up to where they pass through the bulk head would be able to be placed behind the new wall insulation.


This also gave us a moment to remove the original plastic license plate light/mount, which some tourist decided to help themselves to the original Washington License plate a couple years ago by breaking off the lower part of the mount. I'll return in a later chapter to show the new one installed after sealing the original holes and installing the new steel mount.

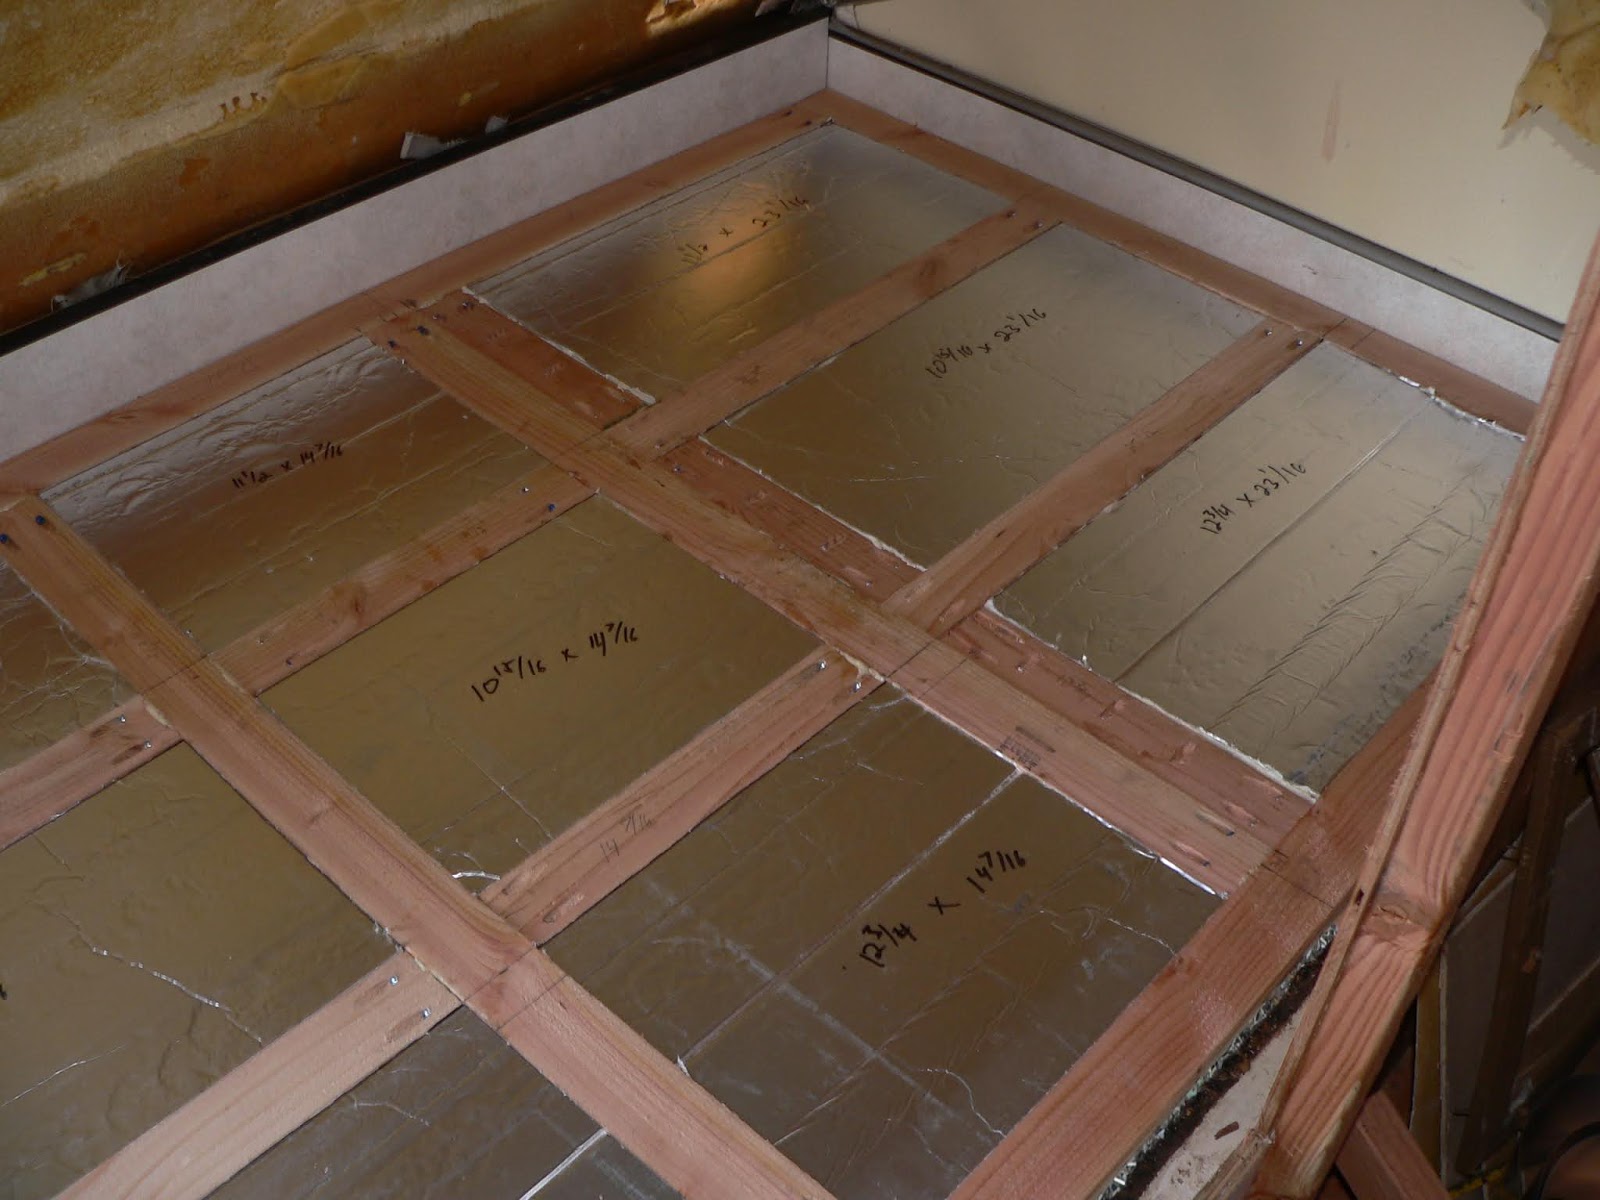
Once the wiring was taken care of, I set about cutting 1/2" polyisocyanurate foam insulation to put in the voids in the bed pan frame (there was no insulation here from factory). As its wasn't practical to remove the aluminum skin that makes up the outer skin of the bed pan, and because there's nothing on the outside of the bed pan on the back section that's up in the clamshell, we'll push the insulation in place in those sections later.
Using the original pieces as patterns, I traced out new wall paneling and reinstalled in into place along the perimeter walls.

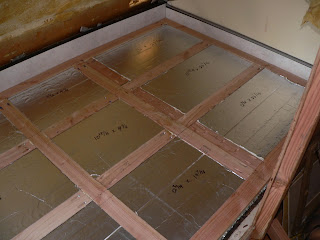
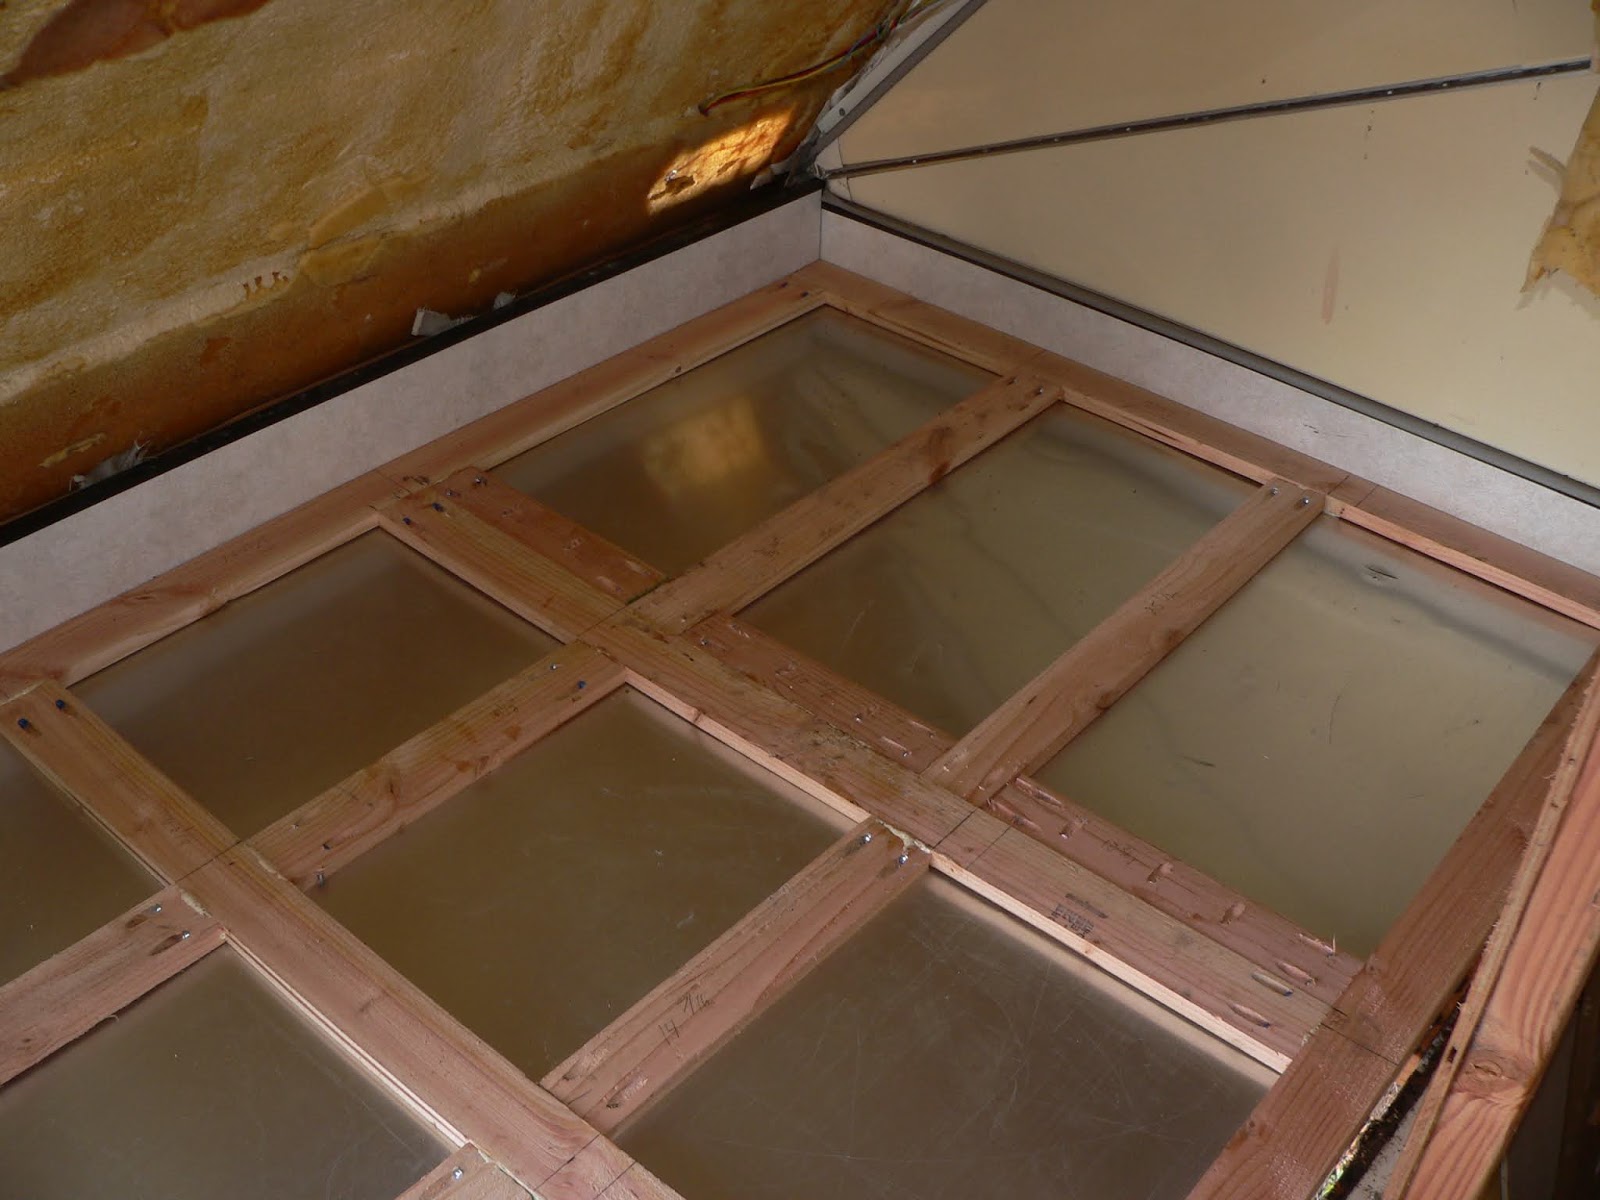
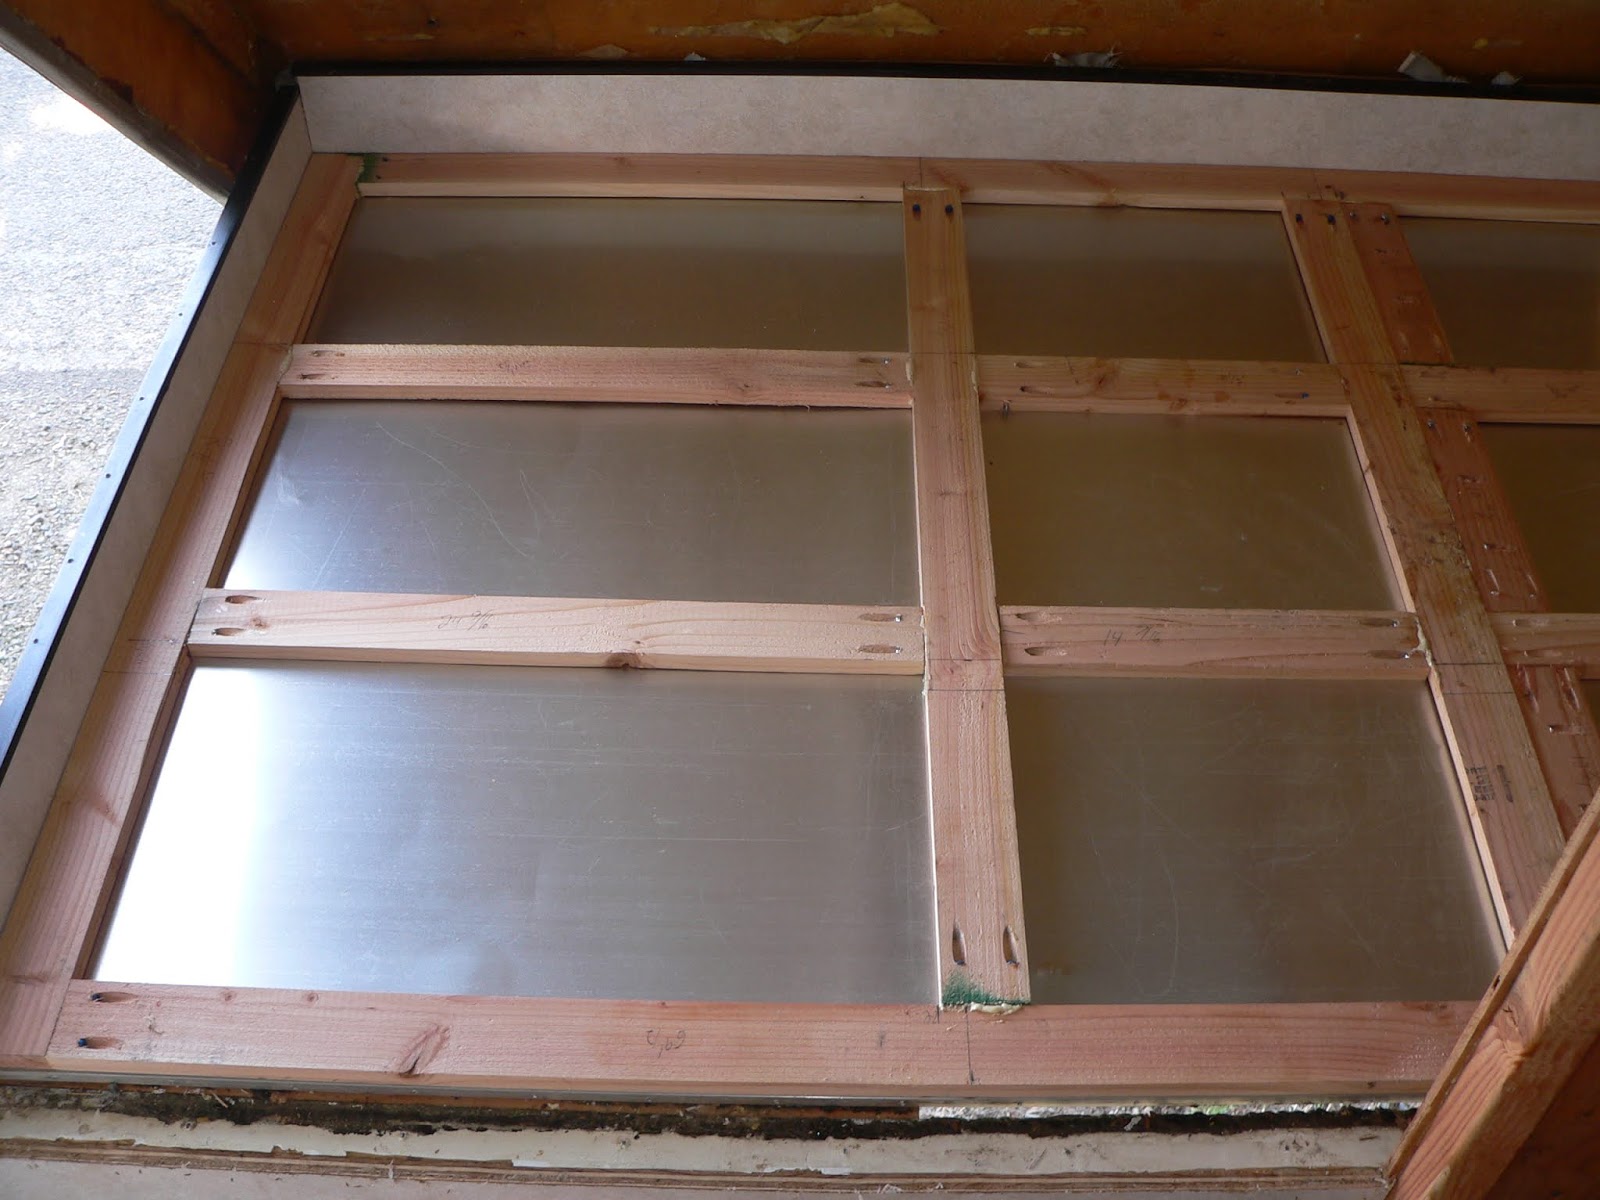
And this is the new bolstering floor frame that is being installed in the bed and and will be sandwich anchored to the original aluminum framed pan floor, which was way too thin to safely support an adult sleeping in this bed. This floor, which is based upon the design and materials used in the cabover floor of Mr. KIT, which supported two adults sleeping on it for years, will be more than durable enough for the single adult that will generally be using this bed. So far, its been weight tested up to 380lbs (AKA I crawled on it) without any bowing or buckling, and this was before the insulation or plywood floor was glued and anchored on top.


More 3/4" polyisocyanurate foam board :). In case folks are wondering why I use this type of foam, its because unlike polystyrene foam found in most RVs, it has nearly double the RV value for equivalent thinkness. Most of Ms. Merry's walls are rated at at least R10 or higher, where the same thickness in polystyrene only yields R4 at best. Since we do alot of camping in cooler temps, bolstering the insulation factor of the walls will help keep the furnace from having to cycle on as much while dry camping or urban boondocking.

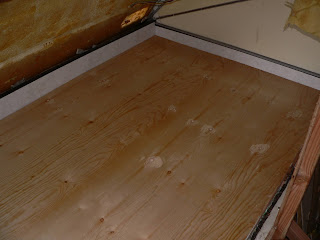
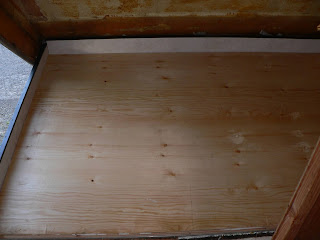
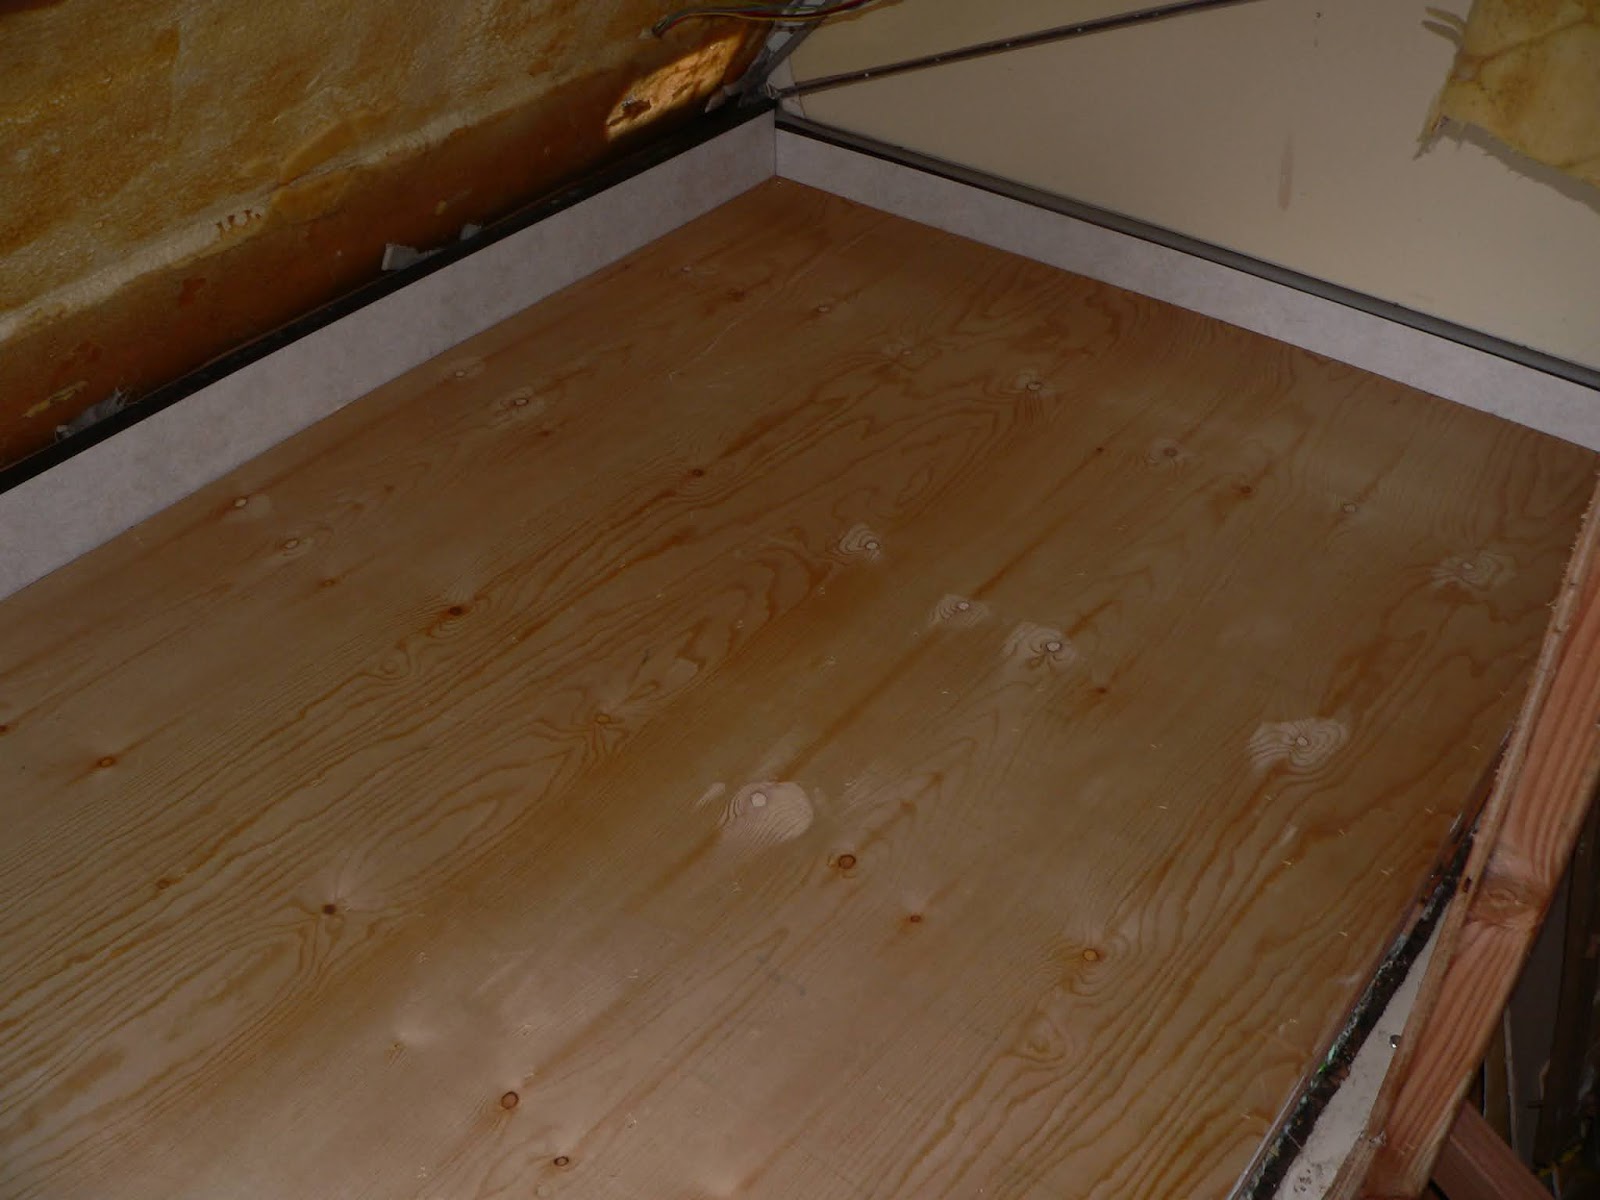
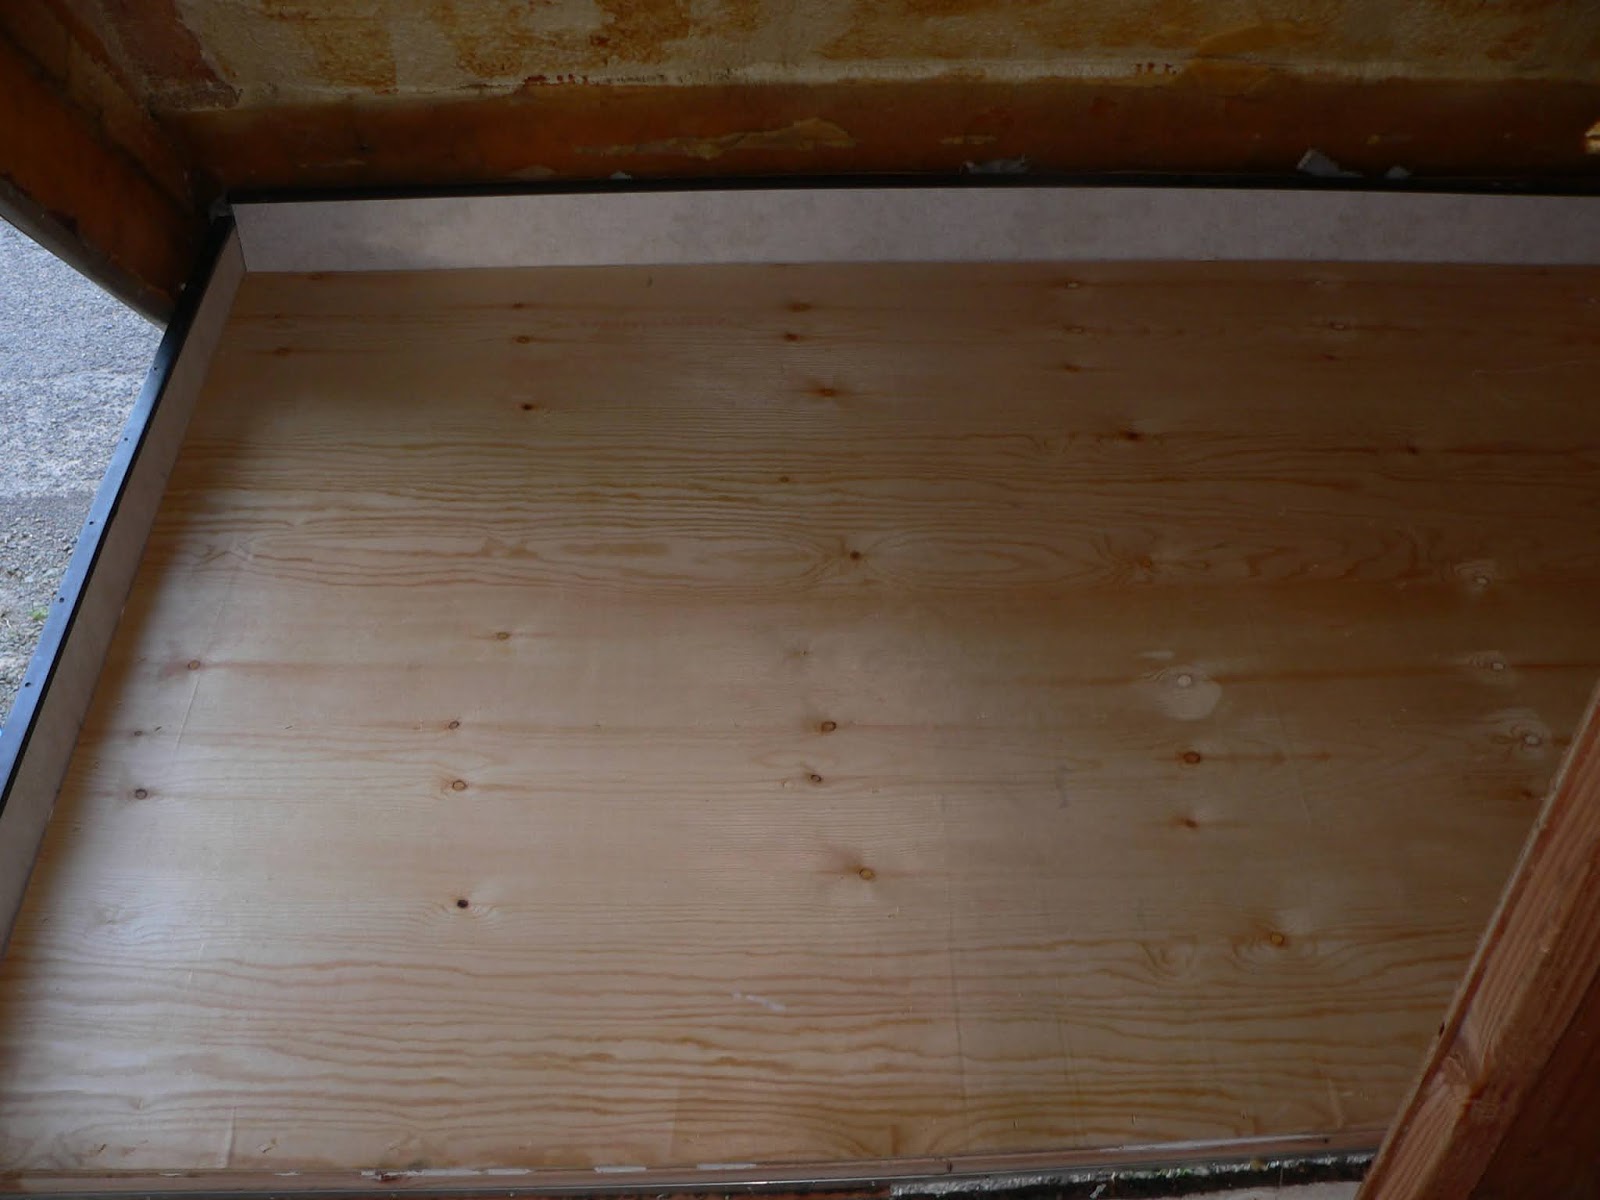
And last, but not least, the new plywood floor is in 🙂
This wraps up Part 4, but there's still much more to post! So stay tuned, I'll be adding more in the upcoming days. 🙂
Rebuilding “Ms. Merry” the Amerigo– And the Story of the Flimsy bed–Part 4
During Part 3, I mentioned that other work was going on while the glue and fiberglass cured on Ms. Merry's new Snap-n-Nap Wings, so in Part 4, we'll cover the work going on inside Ms. Merry's Snap-N-Nap to prep for the installation of the new wing walls :).
To start off, here's Merry's Snap-N-Nap Bed with the mattress finally removed! The pan wood is actually in better shape than I was expecting, given the mildew smell that this area had been hanging onto. Turns out the smell was actually coming from that nasty fabric wall covering they'd used.
The paneling on these sides was held on with a couple small pan-head screws and a very minimal amount of adhesive, I basically just had to push a putty knife between the wood and the aluminum and popped right off.

Time to start getting that nasty vinyl fabric wall mess out once and for all..... To remove it, I simply ran a box knife along the joints to cut it and pulled it out by hand. The vinyl is carpet foam backed type stuff and is only held on with spray adhesive. As I tore it off, I discovered that moisture had gotten in around the window at some point and had soaked into this nasty fabric as the back of it was stained with old mildew and mold spots.


Yay.... more spray foam.....That's all going to have be scrapped off so we can come back later and install some wooden framing along the perimeter for installing proper insulation board and wall paneling later. Mercifully, a rubber mallet and a putty knife pops it off the fiberglass in nice big chunks, leaving little residue behind.
The wooden "floor", and I use that term loosely, was simply held in by two 1/4" headed hex head screws, with them removed it lifted right out. Sadly, I forgot to take a picture of the laughable 1/8" thick fiberglass insulation mat that was underneath the aluminum sheet that makes up the bed pan's outer skin and the wall paneling floor that was in place.

So, my next discovery of stupid was the fact that they had glued the wiring for the tail lights on the inside.... to the foam.... Which makes zero sense, because there's a nice cavity specifically for pulling wires inside of, formed into the fiberglass wall!!!

Fixing this wasn't hard, just annoying, as I had to remove the new tail lights had I installed a couple years back so I could run my fish tape through the wiring cavity and re-pull the wires like they should have been done from the factory. Also took a moment to drill a new entry hole into the top edge of the cavity so that the wires going up to where they pass through the bulk head would be able to be placed behind the new wall insulation.
This also gave us a moment to remove the original plastic license plate light/mount, which some tourist decided to help themselves to the original Washington License plate a couple years ago by breaking off the lower part of the mount. I'll return in a later chapter to show the new one installed after sealing the original holes and installing the new steel mount.
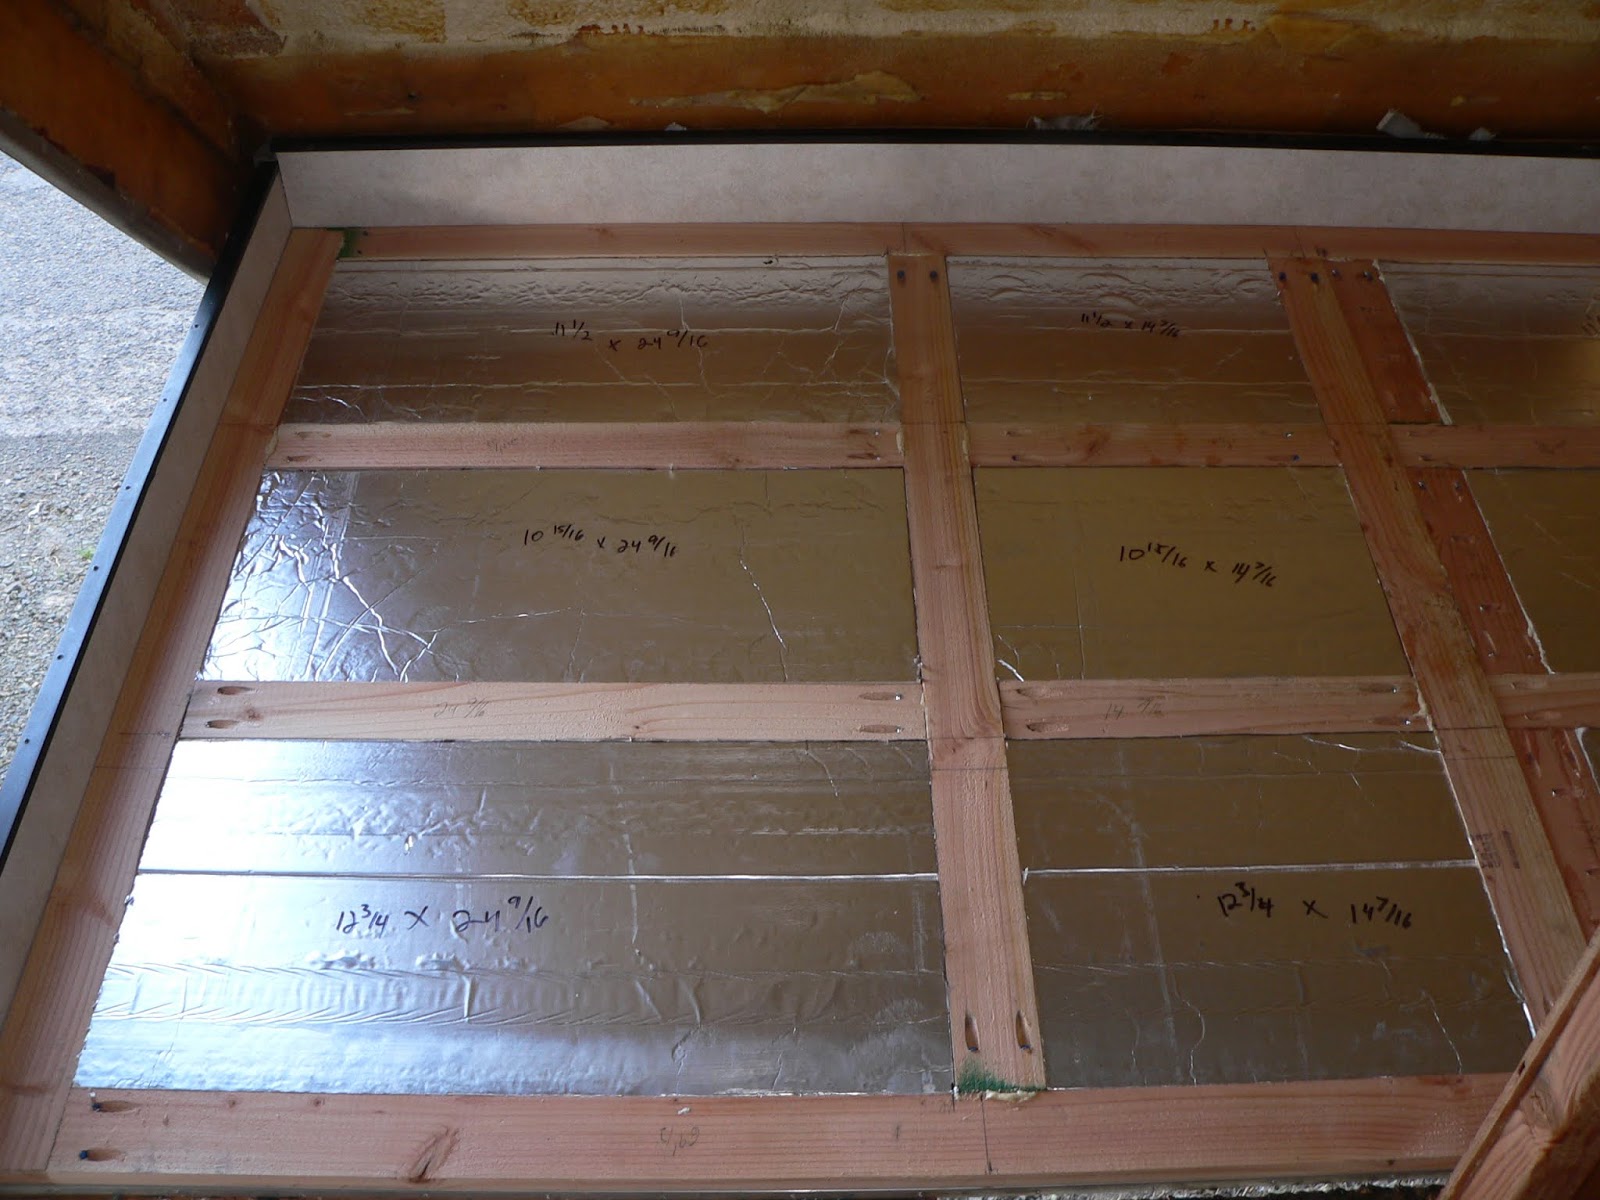
Once the wiring was taken care of, I set about cutting 1/2" polyisocyanurate foam insulation to put in the voids in the bed pan frame (there was no insulation here from factory). As its wasn't practical to remove the aluminum skin that makes up the outer skin of the bed pan, and because there's nothing on the outside of the bed pan on the back section that's up in the clamshell, we'll push the insulation in place in those sections later.


Using the original pieces as patterns, I traced out new wall paneling and reinstalled in into place along the perimeter walls.

And this is the new bolstering floor frame that is being installed in the bed and and will be sandwich anchored to the original aluminum framed pan floor, which was way too thin to safely support an adult sleeping in this bed. This floor, which is based upon the design and materials used in the cabover floor of Mr. KIT, which supported two adults sleeping on it for years, will be more than durable enough for the single adult that will generally be using this bed. So far, its been weight tested up to 380lbs (AKA I crawled on it) without any bowing or buckling, and this was before the insulation or plywood floor was glued and anchored on top.

More 3/4" polyisocyanurate foam board :). In case folks are wondering why I use this type of foam, its because unlike polystyrene foam found in most RVs, it has nearly double the RV value for equivalent thinkness. Most of Ms. Merry's walls are rated at at least R10 or higher, where the same thickness in polystyrene only yields R4 at best. Since we do alot of camping in cooler temps, bolstering the insulation factor of the walls will help keep the furnace from having to cycle on as much while dry camping or urban boondocking.
And last, but not least, the new plywood floor is in 🙂
This wraps up Part 4, but there's still much more to post! So stay tuned, I'll be adding more in the upcoming days. 🙂
My Blog - The Journey of the Redneck Express
'1992 Dodge W-250 "Dually" Power Wagon - Club Cab Long Bed 4x4 V8 5.9L gashog w/4.10 Geared axles
'1974 KIT Kamper 1106 - 11' Slide-in
'2006 Heartland BigHorn 3400RL
CB
Channel 17Redneck Express
'1992 Dodge W-250 "Dually" Power Wagon - Club Cab Long Bed 4x4 V8 5.9L gashog w/4.10 Geared axles
'1974 KIT Kamper 1106 - 11' Slide-in
'2006 Heartland BigHorn 3400RL
Options
- Mark as New
- Bookmark
- Subscribe
- Mute
- Subscribe to RSS Feed
- Permalink
- Report Inappropriate Content
Aug-03-2020 01:10 AM
Sunday, June 28, 2020
Rebuilding “Ms. Merry” the Amerigo– And the Story of the Flimsy bed–Part 3
Alrighty! While the date on this reads June 28th, its actually been about a month since I last updated this blog! Lots of works been getting done, so let's get caught up! 🙂

When we left off, we were rebuilding Ms. Merry's Snap-N-Nap Wings, as the originals were a trash design that we've yet to figure out the logic of.
So, we've been recreating them using proper laminated wood truss-type construction with a 1x3/1x4 inner frame, a thin plywood exterior.

Now that we've got the body of these made, we've installed 3/4" Polyisocyancurate foam board in the center (Yes there is glue between the other side of the foam board and the outer plywood, and now we're laminating on the Finished RV wall board that will be the interior facing side of the wings :).

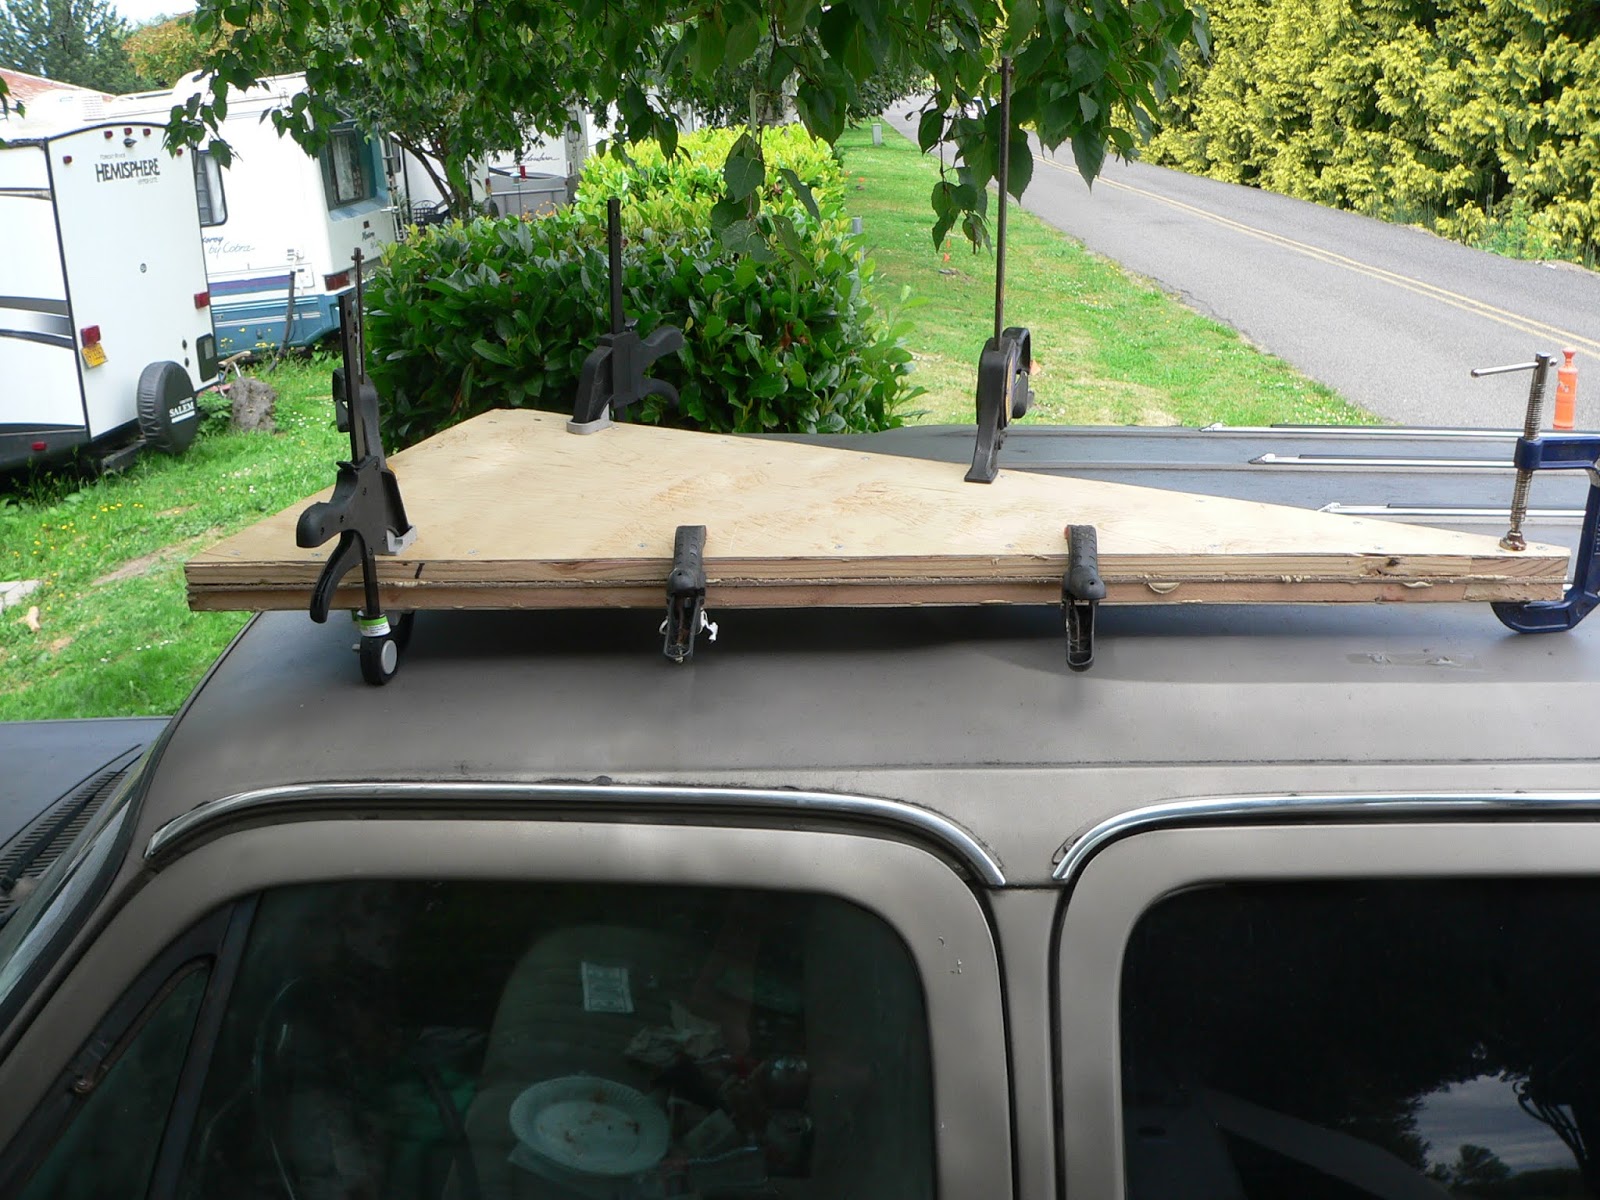
Since we can't really hide the staples we use for anchoring the wall board in place while the adhesive cures for the inside, the solution has been to apply the adhesive to all the gluing surfaces, then temporarily clamp the panel on the mirror side of the section we're working on so that we can flip the inner wall sides facing each other and make a compression clamp sandwich of the two, using the wing pieces to give us a nice tight bond.
These will be left to cure for about 24 hours in this state so that the glue properly sets up before removing the clamp sandwich.

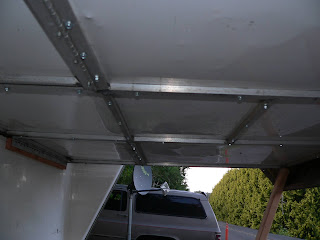
Because I'm working on a few different areas of Ms. Merry at the same time, the second sandwich got set up on the roof of Beasley the Bambi-Slayer's roof while the work bench got used for other tasks 😛
For those that haven't met Beasley, Beasley is my donor Suburban for my next vehicle project, the restoration and 4x4 conversion of Charlie Blue, my childhood family car that I grew up with.
I bought Beasley off a neighbor who paid to have him brought back from Southern California sight unseen only to discover Beasley was going to be a bigger project than he was hoping for, so I bought Beasley off him to donate his 4x4 parts, and drive train components to finish getting Charlie Blue back to road worthy status.

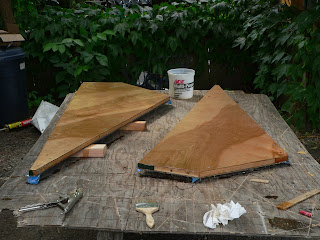
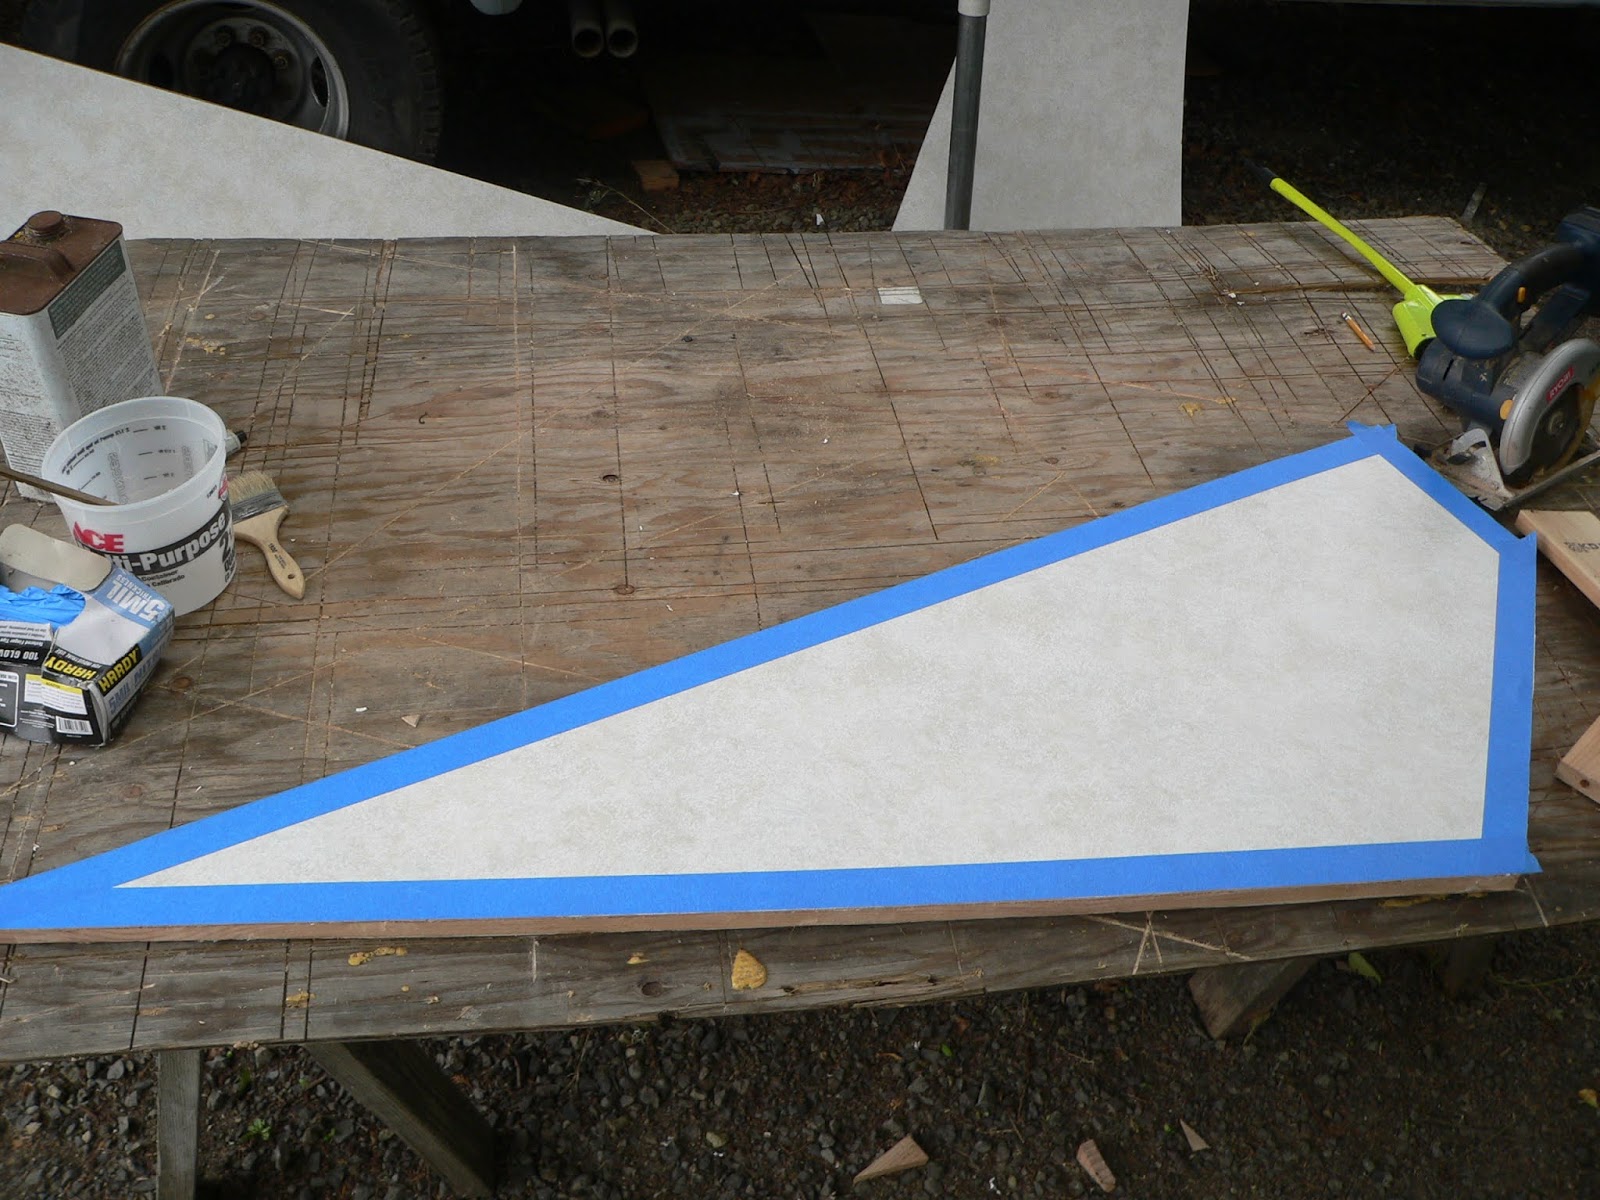
Now, that the panels have had a couple days to finish curing, we can tape up the corners of the RV wall panel side so that over run from the base coat of fiberglass resin won't get on the nice wall paper sides of the wings.
We'll be removing the tape after the first coat has had enough time to setup to were it can be touched, but still soft enough that we can remove the excess by simply peeling the tape of.
We'll be applying multiple layers of fiberglass resin, along with the cloth after this base coat, as the base coat is simply meant to seal the pores of the wood.
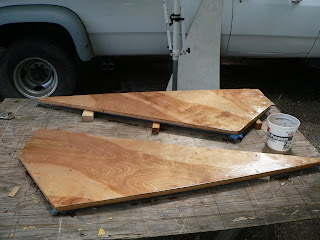
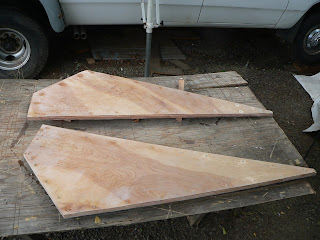
The results of the first fiberglass coat, looking shiny! We'll fix that with some nice sanding to prep it for the application of coat number two, and the fiberglass cloth around the edges.
And sanding is complete!
Rebuilding “Ms. Merry” the Amerigo– And the Story of the Flimsy bed–Part 3
Alrighty! While the date on this reads June 28th, its actually been about a month since I last updated this blog! Lots of works been getting done, so let's get caught up! 🙂

When we left off, we were rebuilding Ms. Merry's Snap-N-Nap Wings, as the originals were a trash design that we've yet to figure out the logic of.
So, we've been recreating them using proper laminated wood truss-type construction with a 1x3/1x4 inner frame, a thin plywood exterior.

Now that we've got the body of these made, we've installed 3/4" Polyisocyancurate foam board in the center (Yes there is glue between the other side of the foam board and the outer plywood, and now we're laminating on the Finished RV wall board that will be the interior facing side of the wings :).

Since we can't really hide the staples we use for anchoring the wall board in place while the adhesive cures for the inside, the solution has been to apply the adhesive to all the gluing surfaces, then temporarily clamp the panel on the mirror side of the section we're working on so that we can flip the inner wall sides facing each other and make a compression clamp sandwich of the two, using the wing pieces to give us a nice tight bond.
These will be left to cure for about 24 hours in this state so that the glue properly sets up before removing the clamp sandwich.
Because I'm working on a few different areas of Ms. Merry at the same time, the second sandwich got set up on the roof of Beasley the Bambi-Slayer's roof while the work bench got used for other tasks 😛
For those that haven't met Beasley, Beasley is my donor Suburban for my next vehicle project, the restoration and 4x4 conversion of Charlie Blue, my childhood family car that I grew up with.
I bought Beasley off a neighbor who paid to have him brought back from Southern California sight unseen only to discover Beasley was going to be a bigger project than he was hoping for, so I bought Beasley off him to donate his 4x4 parts, and drive train components to finish getting Charlie Blue back to road worthy status.
Now, that the panels have had a couple days to finish curing, we can tape up the corners of the RV wall panel side so that over run from the base coat of fiberglass resin won't get on the nice wall paper sides of the wings.
We'll be removing the tape after the first coat has had enough time to setup to were it can be touched, but still soft enough that we can remove the excess by simply peeling the tape of.
We'll be applying multiple layers of fiberglass resin, along with the cloth after this base coat, as the base coat is simply meant to seal the pores of the wood.

The results of the first fiberglass coat, looking shiny! We'll fix that with some nice sanding to prep it for the application of coat number two, and the fiberglass cloth around the edges.

And sanding is complete!
My Blog - The Journey of the Redneck Express
'1992 Dodge W-250 "Dually" Power Wagon - Club Cab Long Bed 4x4 V8 5.9L gashog w/4.10 Geared axles
'1974 KIT Kamper 1106 - 11' Slide-in
'2006 Heartland BigHorn 3400RL
CB
Channel 17Redneck Express
'1992 Dodge W-250 "Dually" Power Wagon - Club Cab Long Bed 4x4 V8 5.9L gashog w/4.10 Geared axles
'1974 KIT Kamper 1106 - 11' Slide-in
'2006 Heartland BigHorn 3400RL
Options
- Mark as New
- Bookmark
- Subscribe
- Mute
- Subscribe to RSS Feed
- Permalink
- Report Inappropriate Content
Jul-01-2020 03:58 AM
.....bloody good work, Matt! I'm still following. Nice restore!
Cheers,
Silver-
Cheers,
Silver-
Silver
2004 Chevy Silverado 2500HD 4x4 6.0L Ext/LB Tow Package 4L80E Michelin AT2s| Outfitter Caribou
2004 Chevy Silverado 2500HD 4x4 6.0L Ext/LB Tow Package 4L80E Michelin AT2s| Outfitter Caribou
Options
- Mark as New
- Bookmark
- Subscribe
- Mute
- Subscribe to RSS Feed
- Permalink
- Report Inappropriate Content
Jun-24-2020 04:52 PM
JoeChiOhki wrote:mountainkowboy wrote:
Your as bad as I am.....LOL. I plan on tearing the S&S apart again to "finalize" the upgrades/mods/repairs that we planned on 12 years ago.
The section here is the only part I hadn't refurbished/restored of Ms. Merry in the process, its still all 1975 Original, including the mattress, which is solely hanging around because I need the cover from it to use as a template for the new one for the new mattress.
Given we planned to have adults sleeping in that bed, its very good that we discovered the structural deficiency in how the bed is supported at the edge furthest from the back wall.
Yep....a labor of love!
Chuck & Ruth with 4-legged Molly
2007 Tiffin Allegro 30DA
2011 Ford Ranger
1987 HD FLHTP
2007 Tiffin Allegro 30DA
2011 Ford Ranger
1987 HD FLHTP
Options
- Mark as New
- Bookmark
- Subscribe
- Mute
- Subscribe to RSS Feed
- Permalink
- Report Inappropriate Content
Jun-24-2020 09:52 AM
mountainkowboy wrote:
Your as bad as I am.....LOL. I plan on tearing the S&S apart again to "finalize" the upgrades/mods/repairs that we planned on 12 years ago.
The section here is the only part I hadn't refurbished/restored of Ms. Merry in the process, its still all 1975 Original, including the mattress, which is solely hanging around because I need the cover from it to use as a template for the new one for the new mattress.
Given we planned to have adults sleeping in that bed, its very good that we discovered the structural deficiency in how the bed is supported at the edge furthest from the back wall.
My Blog - The Journey of the Redneck Express
'1992 Dodge W-250 "Dually" Power Wagon - Club Cab Long Bed 4x4 V8 5.9L gashog w/4.10 Geared axles
'1974 KIT Kamper 1106 - 11' Slide-in
'2006 Heartland BigHorn 3400RL
CB
Channel 17Redneck Express
'1992 Dodge W-250 "Dually" Power Wagon - Club Cab Long Bed 4x4 V8 5.9L gashog w/4.10 Geared axles
'1974 KIT Kamper 1106 - 11' Slide-in
'2006 Heartland BigHorn 3400RL
Options
- Mark as New
- Bookmark
- Subscribe
- Mute
- Subscribe to RSS Feed
- Permalink
- Report Inappropriate Content
Jun-23-2020 11:26 AM
Your as bad as I am.....LOL. I plan on tearing the S&S apart again to "finalize" the upgrades/mods/repairs that we planned on 12 years ago.
Chuck & Ruth with 4-legged Molly
2007 Tiffin Allegro 30DA
2011 Ford Ranger
1987 HD FLHTP
2007 Tiffin Allegro 30DA
2011 Ford Ranger
1987 HD FLHTP
Options
- Mark as New
- Bookmark
- Subscribe
- Mute
- Subscribe to RSS Feed
- Permalink
- Report Inappropriate Content
Jun-21-2020 11:08 PM
Sunday, June 21, 2020
Rebuilding “Ms. Merry” the Amerigo– And the Story of the Flimsy bed–Part 2
Part 2 of the ongoing rebuilding saga of Ms. Merry's Snap-N-Nap! When we left off yesterday, we'd discovered that the flimsy plastic of the accordion wings was all that was holding the bed pan to the outer clamshell of the Snap-N-Nap bed, which wasn't exactly a very strong setup.
We'd hoped that after doing some more digging in the interior that we'd find another piece of wood fiberglassed into the wall of the outer clamshell that was supposed to have a piano hinge attached to it to bear the load of the bed, unfortunately, during today's investigations, what we thought was wood was actually just dirt inside in hollow cavity that was formed in the fiberglass to allow wiring to run for the tail lights, so sadly, we're going to need to rebuild the wings as they were.
Since we can't change the design, I decided to go with rebuilding the wings from scratch and building them so that they're a proper structural piece made of a laminated truss.
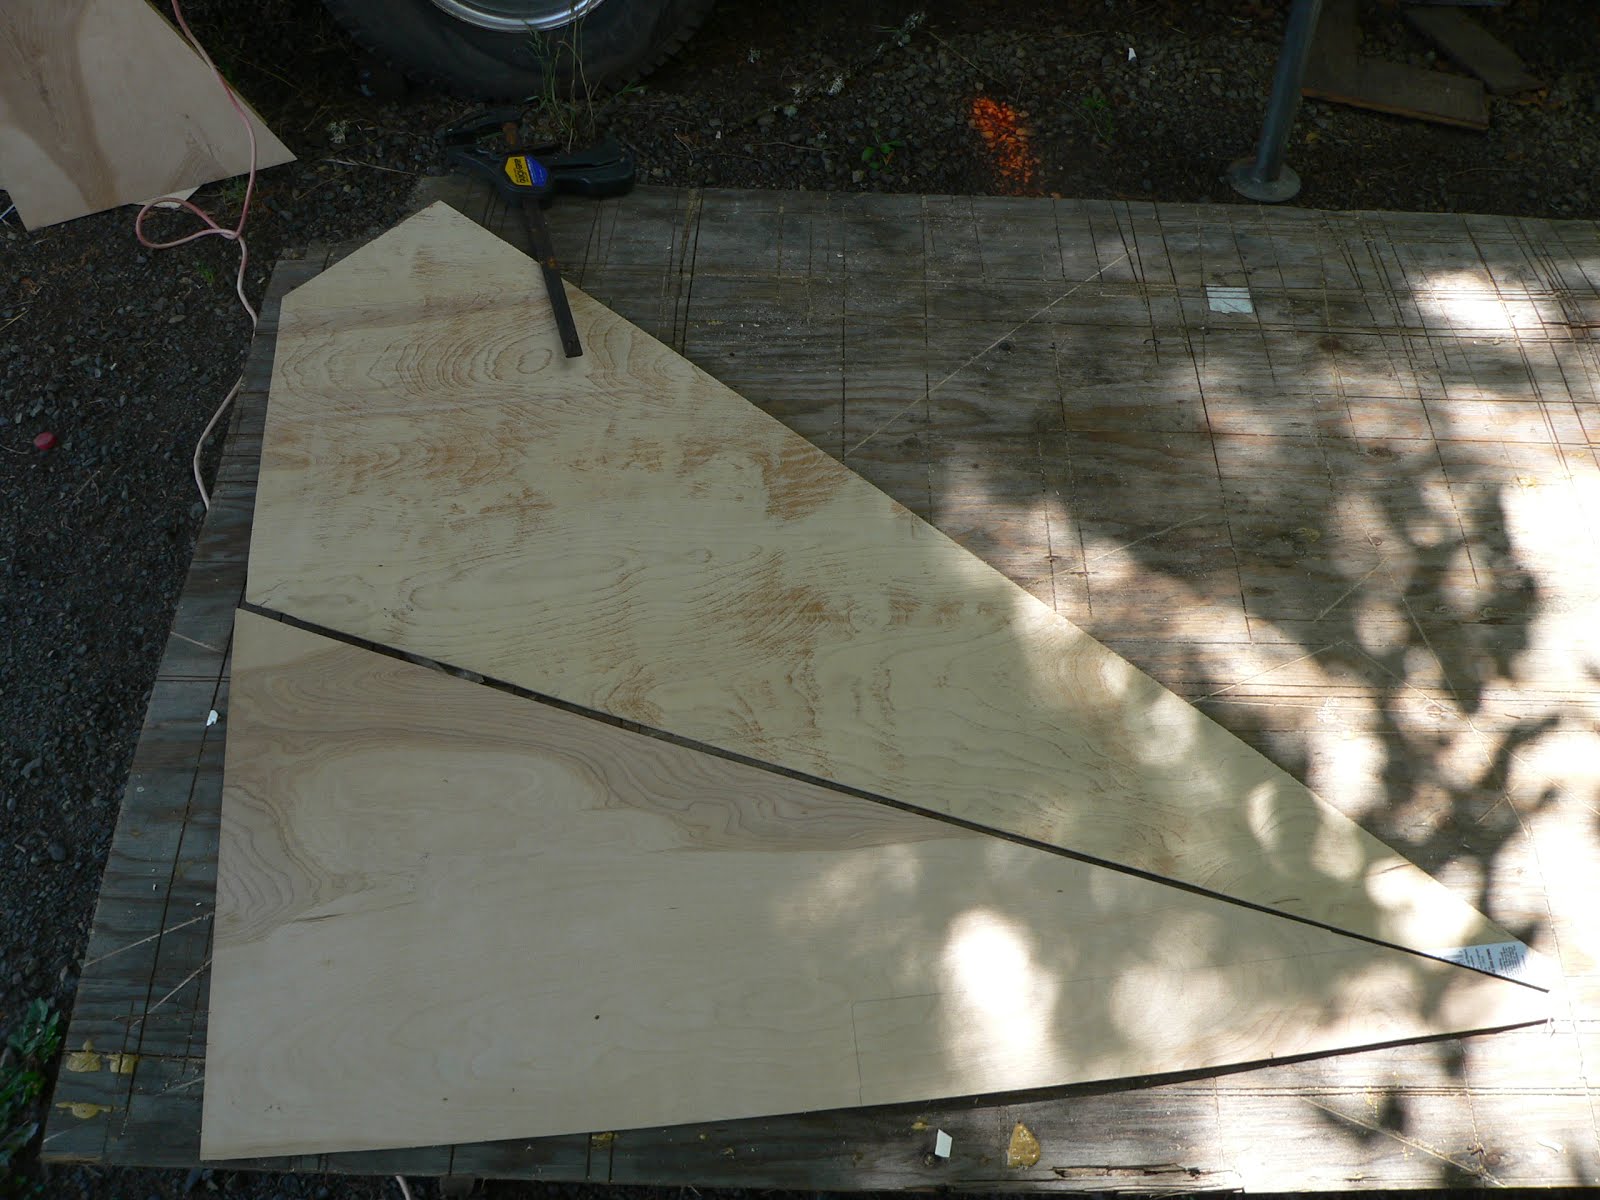
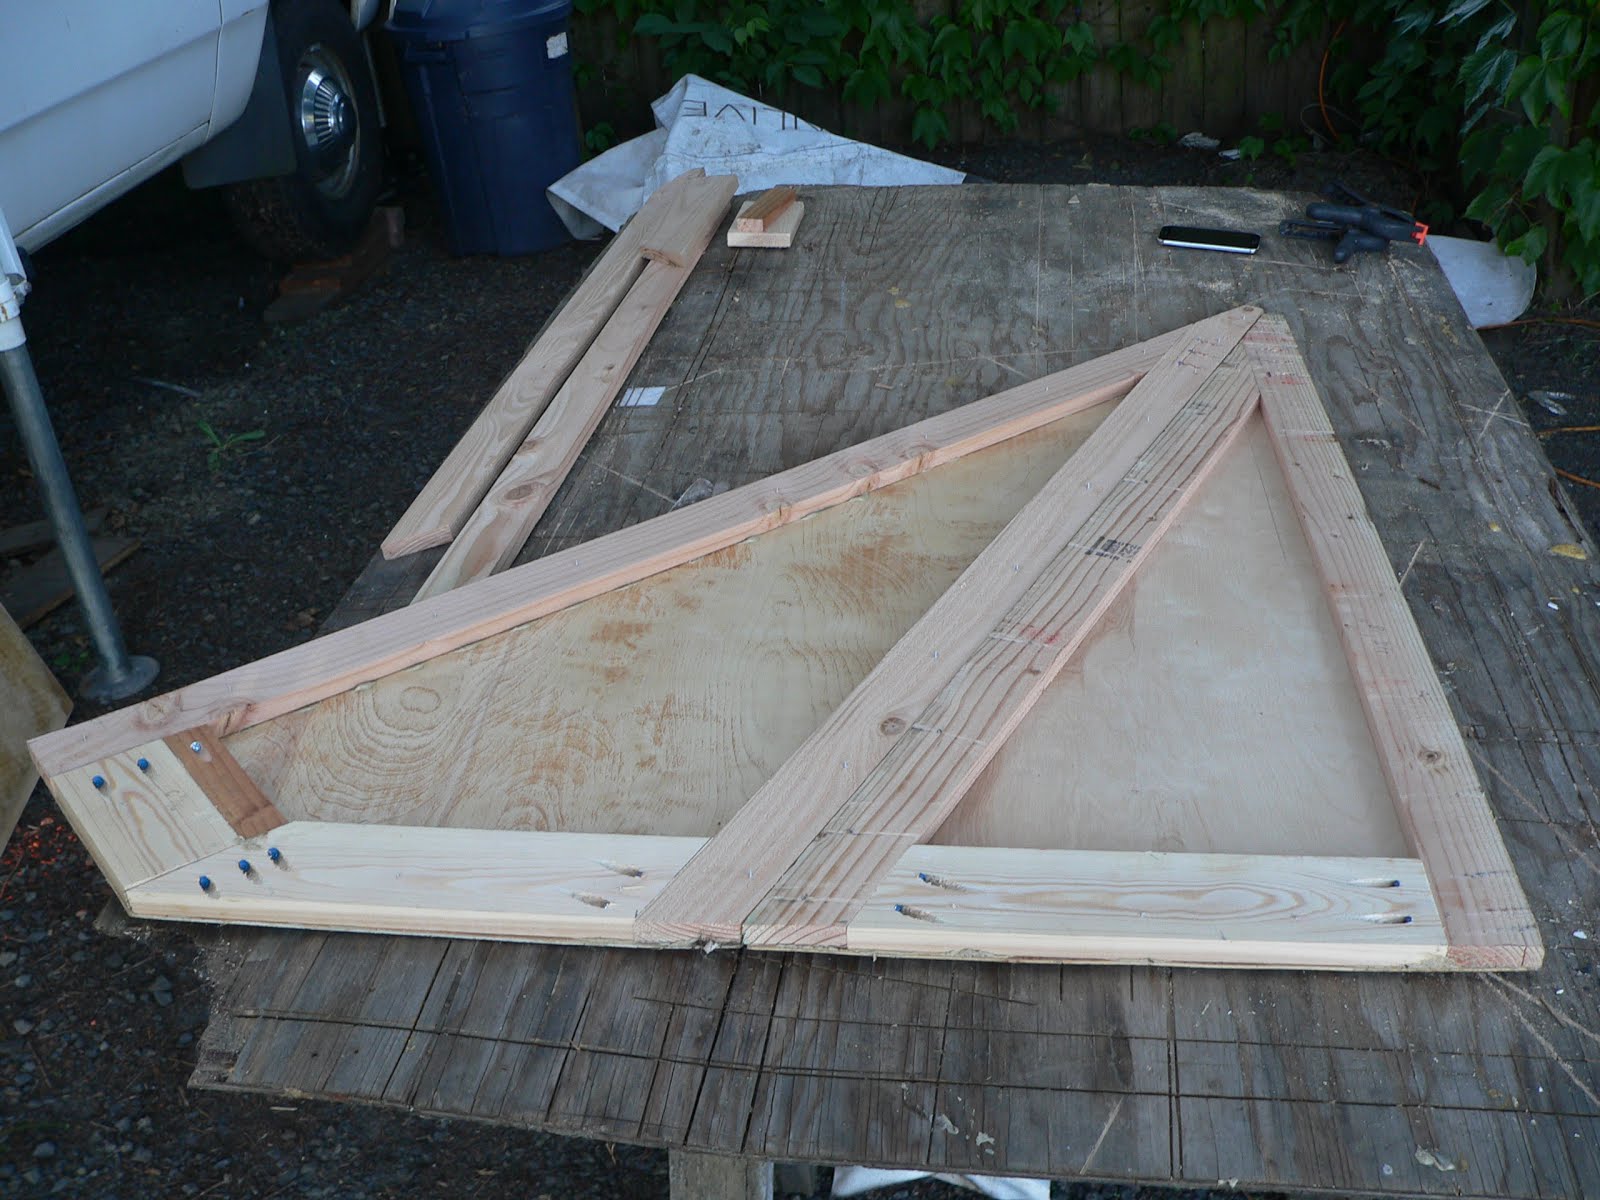
To start, I used the dismantled wings to trace out the pattern of the original design on some thinner door skin plywood I had on hand for this sort of thing, then cut out two new uppers and lowers.

The wings were made out of this sanded plywood because we'll be coming back once these are fully laminated together and finishing the exterior sides and frame edges with fiberglass resin and then painting it with a glossy polar white epoxy paint to match the sides of the Ms. Merry.
Compared to pre-made filon, these are thicker and much more structural stout. The center of the Uppers and Lowers will be filled with foil-sided Polyisocyanurate insulation foam which will be glued and laminated in as part of the wing structure.
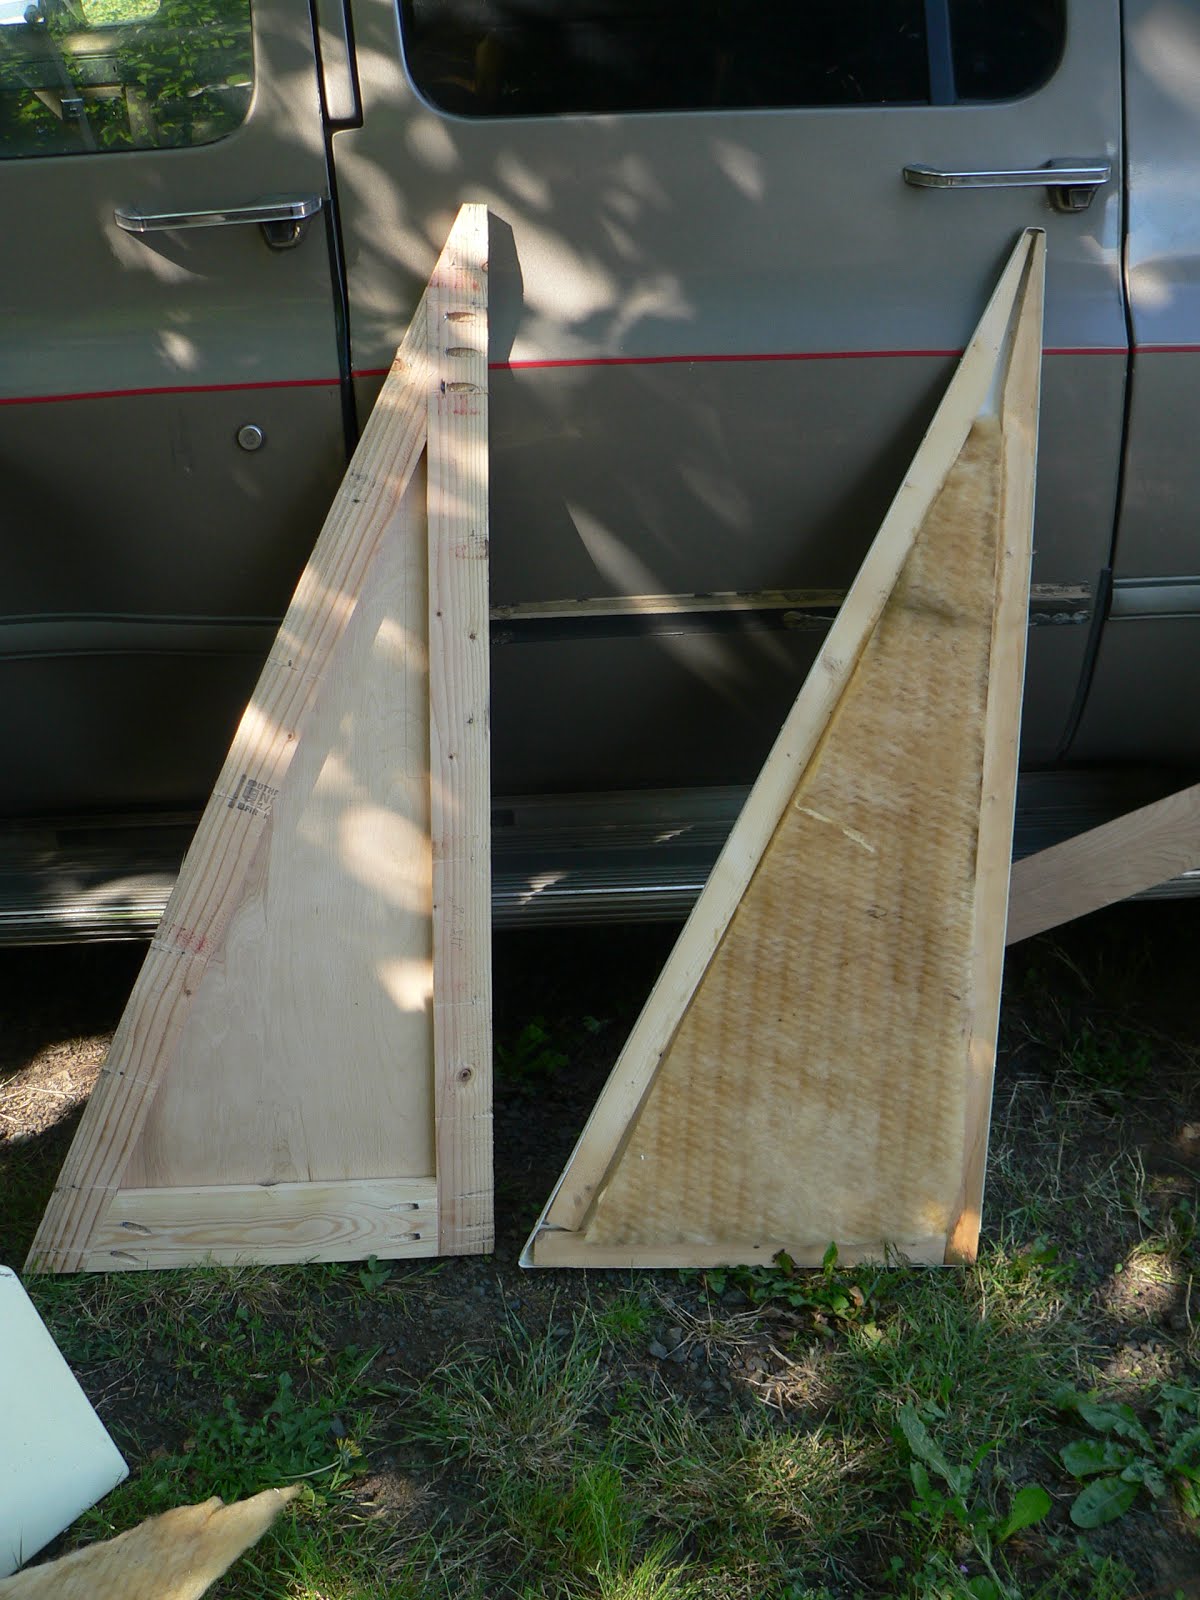
For the main structure, I used 1x4 and 1x3 lumber to make the frame, with 1x4s used along the edges that would be getting clamped in place when the bed is deployed so that latched could be attached to the wings allowing me to remove the hinged clamp boards that were used originally in the camper.
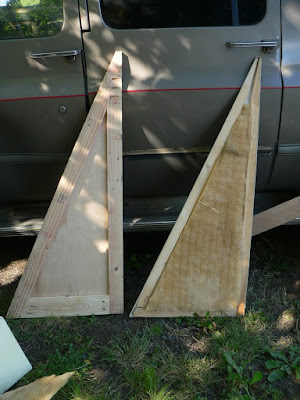
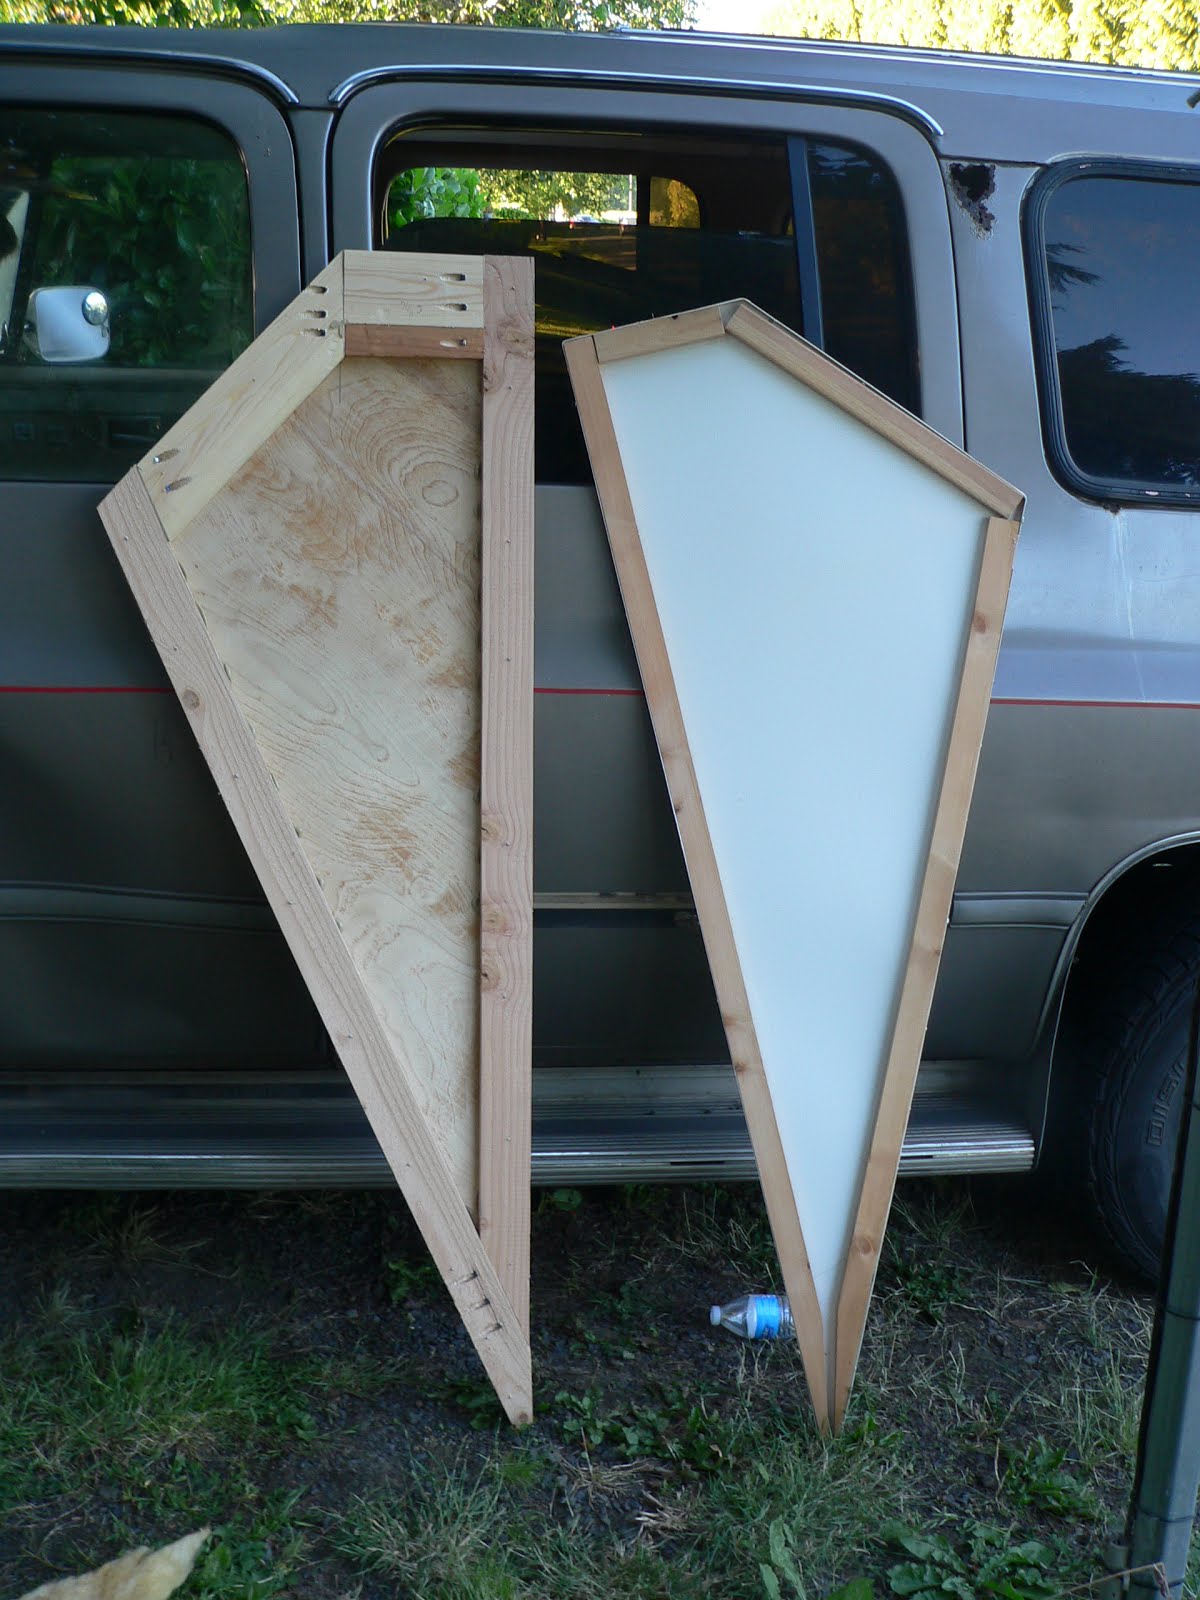
A quick side by side of the new lower and the original with its non-structural loose wooden interior pieces. That wood is only attached loosely to the outside plastic, and what was bearing all the load of the deployed bed pan and carrying the load into the outer clamshell structure.
The only thing carrying all that weight is that disintegrating plastic, it literally was crumbling under my fingers, I am truthfully amazed the bed didn't drop out, when the Snap-N-Nap was used for storing building materials in the past couple years.
Another side by side, and yes, the new wing is built the right direction. Gardner Industries used the same wing piece for both sides, so on one side the seam of the overlapping plastic faced inwards, on the other it faced outward. With the thin fiberglass insulation removed, you can see the original color of the Snap-N-Nap wings, and how much they've yellowed in the last forty-five years!

Ran out of time today to get the last upper assembled, but all the pieces were cut, and tomorrow I'll be able to finish the assembly and start cutting the new insulation and trace out the inner skins.


And here's one of the new sides test laid out on the workbench :). I'll likely trim the little corner on the upper so that it ends flush with the lower (This is an exact trace of the sides, and they're not the same size, and there's no real purpose to one being half an inch longer than the other).
These should be a tad stronger than the flimsy plastic originals and I won't have to worry about them catastrophically failing while on a trip.
Rebuilding “Ms. Merry” the Amerigo– And the Story of the Flimsy bed–Part 2
Part 2 of the ongoing rebuilding saga of Ms. Merry's Snap-N-Nap! When we left off yesterday, we'd discovered that the flimsy plastic of the accordion wings was all that was holding the bed pan to the outer clamshell of the Snap-N-Nap bed, which wasn't exactly a very strong setup.
We'd hoped that after doing some more digging in the interior that we'd find another piece of wood fiberglassed into the wall of the outer clamshell that was supposed to have a piano hinge attached to it to bear the load of the bed, unfortunately, during today's investigations, what we thought was wood was actually just dirt inside in hollow cavity that was formed in the fiberglass to allow wiring to run for the tail lights, so sadly, we're going to need to rebuild the wings as they were.
Since we can't change the design, I decided to go with rebuilding the wings from scratch and building them so that they're a proper structural piece made of a laminated truss.
To start, I used the dismantled wings to trace out the pattern of the original design on some thinner door skin plywood I had on hand for this sort of thing, then cut out two new uppers and lowers.
The wings were made out of this sanded plywood because we'll be coming back once these are fully laminated together and finishing the exterior sides and frame edges with fiberglass resin and then painting it with a glossy polar white epoxy paint to match the sides of the Ms. Merry.
Compared to pre-made filon, these are thicker and much more structural stout. The center of the Uppers and Lowers will be filled with foil-sided Polyisocyanurate insulation foam which will be glued and laminated in as part of the wing structure.
For the main structure, I used 1x4 and 1x3 lumber to make the frame, with 1x4s used along the edges that would be getting clamped in place when the bed is deployed so that latched could be attached to the wings allowing me to remove the hinged clamp boards that were used originally in the camper.
A quick side by side of the new lower and the original with its non-structural loose wooden interior pieces. That wood is only attached loosely to the outside plastic, and what was bearing all the load of the deployed bed pan and carrying the load into the outer clamshell structure.
The only thing carrying all that weight is that disintegrating plastic, it literally was crumbling under my fingers, I am truthfully amazed the bed didn't drop out, when the Snap-N-Nap was used for storing building materials in the past couple years.
Another side by side, and yes, the new wing is built the right direction. Gardner Industries used the same wing piece for both sides, so on one side the seam of the overlapping plastic faced inwards, on the other it faced outward. With the thin fiberglass insulation removed, you can see the original color of the Snap-N-Nap wings, and how much they've yellowed in the last forty-five years!
Ran out of time today to get the last upper assembled, but all the pieces were cut, and tomorrow I'll be able to finish the assembly and start cutting the new insulation and trace out the inner skins.
And here's one of the new sides test laid out on the workbench :). I'll likely trim the little corner on the upper so that it ends flush with the lower (This is an exact trace of the sides, and they're not the same size, and there's no real purpose to one being half an inch longer than the other).
These should be a tad stronger than the flimsy plastic originals and I won't have to worry about them catastrophically failing while on a trip.
My Blog - The Journey of the Redneck Express
'1992 Dodge W-250 "Dually" Power Wagon - Club Cab Long Bed 4x4 V8 5.9L gashog w/4.10 Geared axles
'1974 KIT Kamper 1106 - 11' Slide-in
'2006 Heartland BigHorn 3400RL
CB
Channel 17Redneck Express
'1992 Dodge W-250 "Dually" Power Wagon - Club Cab Long Bed 4x4 V8 5.9L gashog w/4.10 Geared axles
'1974 KIT Kamper 1106 - 11' Slide-in
'2006 Heartland BigHorn 3400RL


