Turn on suggestions
Auto-suggest helps you quickly narrow down your search results by suggesting possible matches as you type.
Showing results for
- Good Sam Community
- Groups
- Travel Trailer Group
- Forum
- Re: '71 Starcraft Wanderstar- "The Hilton"
Options
- Subscribe to RSS Feed
- Mark Topic as New
- Mark Topic as Read
- Float this Topic for Current User
- Bookmark
- Subscribe
- Mute
- Printer Friendly Page
'71 Starcraft Wanderstar- "The Hilton"
Options
- Mark as New
- Bookmark
- Subscribe
- Mute
- Subscribe to RSS Feed
- Permalink
- Report Inappropriate Content
Jan-09-2012 07:10 PM
Thought I should post this up because the "Search" feature doesn't return any results and there might be some useful info for older Starcraft owners or those that are mad enough to embark on a complete restoration.
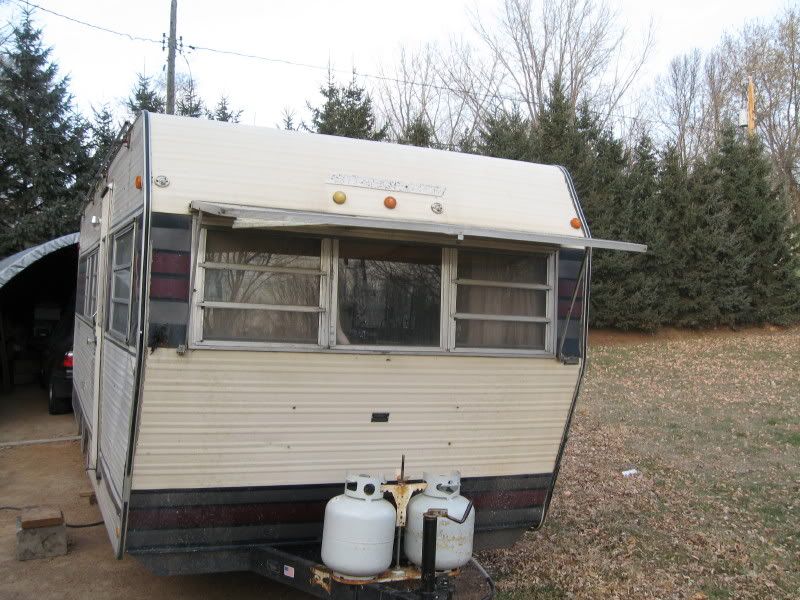
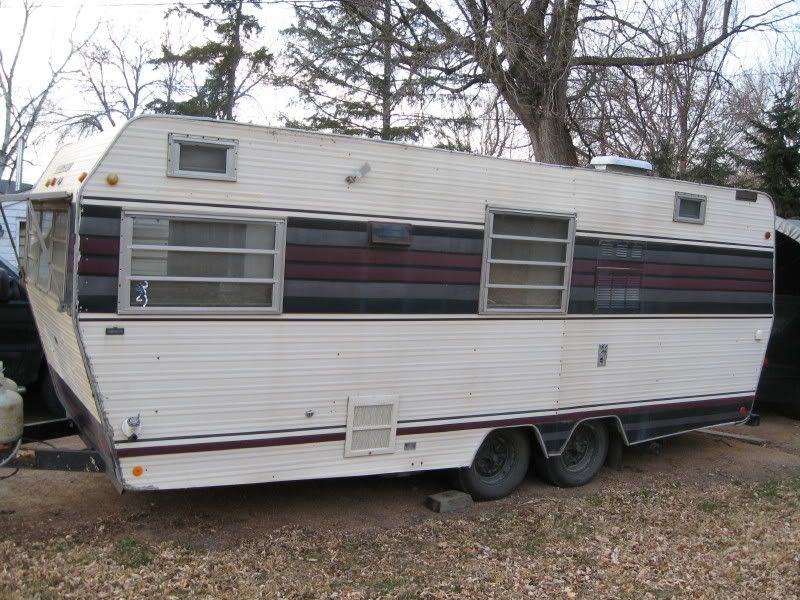
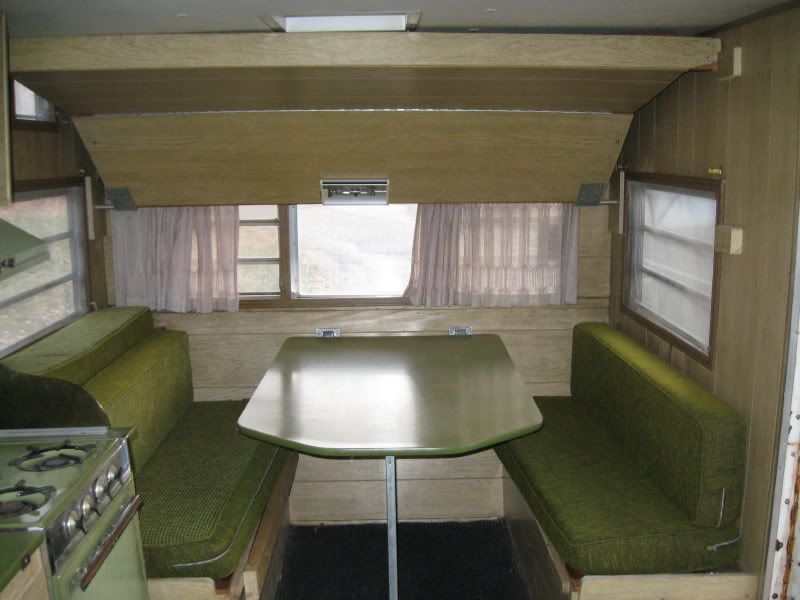
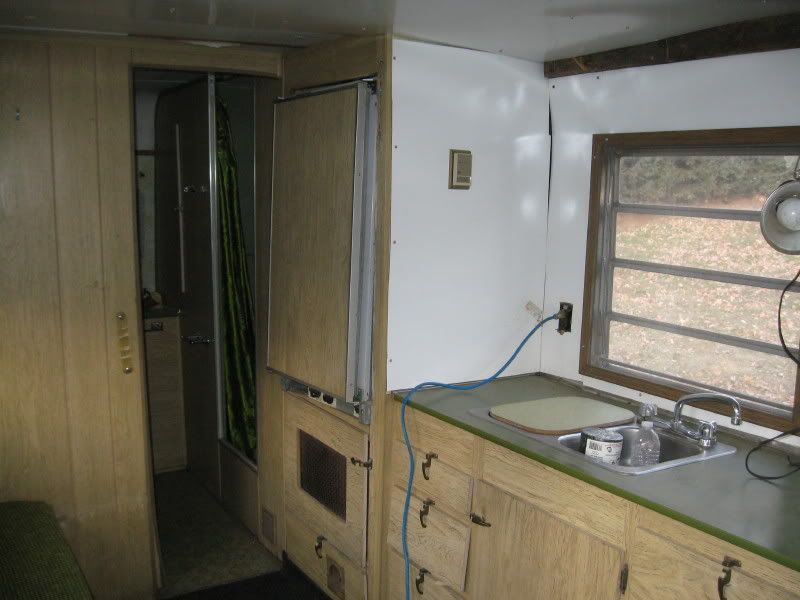
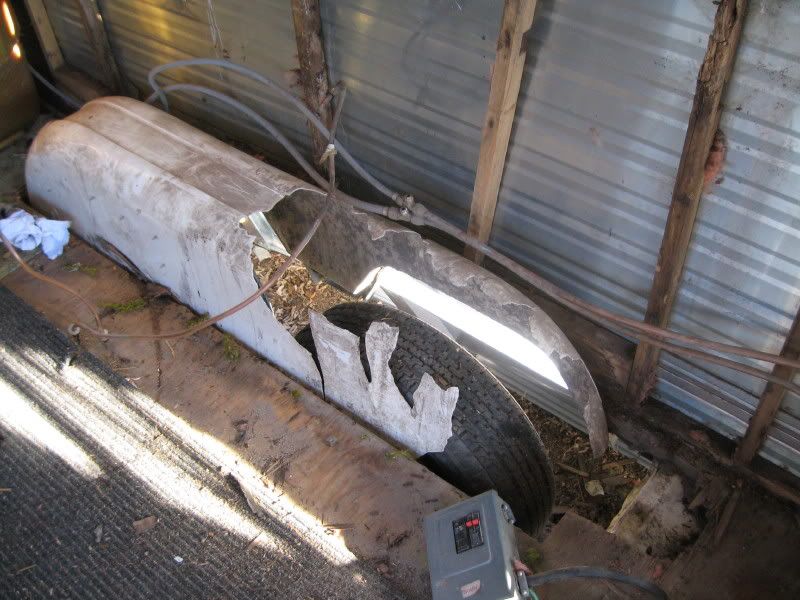
I purchased this 1971 Starcraft-Wanderstar from a local chap with a special purpose in mind: Gutting out the interior to insulate and make comfrotable for working stiffs like myself and, in particular, for those doing work-camping in the upper Midwest. My criteria was: a name brand with solid fame construction, a body that could be worked with (no accident damage, and good running gear (wheels, tires, bearings, and hitch, etc.) I also focused my purchase towards a TT from 19'->26'. I have a Ford F-250 4x4, CC with trailer and tow package. Pictures of "The Hilton" (named and painted by a previous owner) as bought:

I am currently still working on the Hilton and have about three weeks into it, so far. I am keeping a pictorial work log and will share most of it if others are interested. I have totally gutted the inside and am discarding most of the mechanicals, along with replacing and eliminating windows, repairing water-damaged framing (all of the wall top plates and half of the studs), relocating most of the plumbing, replacing all of the wiring, and installing a completely different decorative style.
To give an idea of what I found after gutting out the inside, here is a picture of the driver's side and the wheel well:
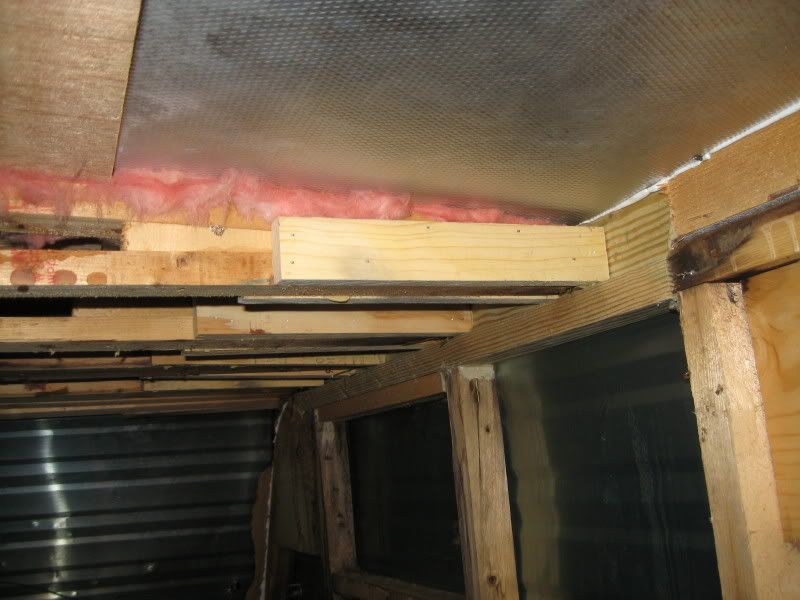
Here is that same area after reconstruction, the new wheel well frame is skinned with 16 ga. steel sheet, inside, and sprayed with truck bed liner. The frame is insulated and there is a thermal break between any out side joining surfaces and the inside sheeting.

Two of the most cantankerous aspects have been the replacement of the top wall plates and aluminum trim rail and removal of the floor to insulate. The major obstacle to the first is the amount of various goop that was used by previous owners to stop water intrusion. That, and the thousands of clutch drive screws and staples that were removed. The basic carpentry was simple, I replaced the rotten wood with pressure treated fir and, after a day with a grinder fitted with a steel wire wheel to clean the trim rail, the surfaces were all sealed, stapled, and screwed back together.
This picture shows the new top plates and the rafter reinforcement I thought was necessary:
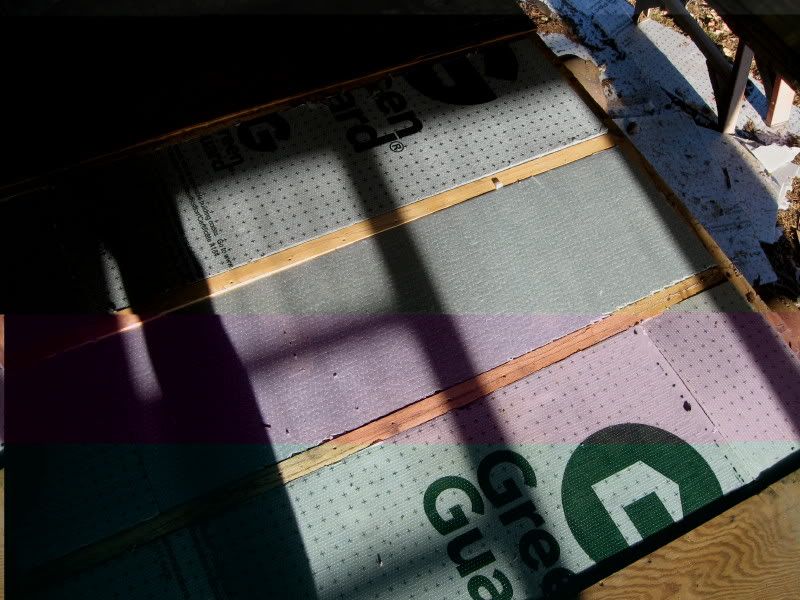
While diving into the wheel well repair I noticed the floor had deteriorated under the water heater. Closer examination showed that the 1 1/2" space underneath the floor was uninsulated, excepting the 1/2" Buildrite on top of the aluminum belly skin. I pulled all of the plywood and installed 1 1/2" of extruded polystyrene in that space:
I've replaced two of the three windows I planned on and have removed two, all together. Those vacated jalousie windows are framed and will become insulated wall.
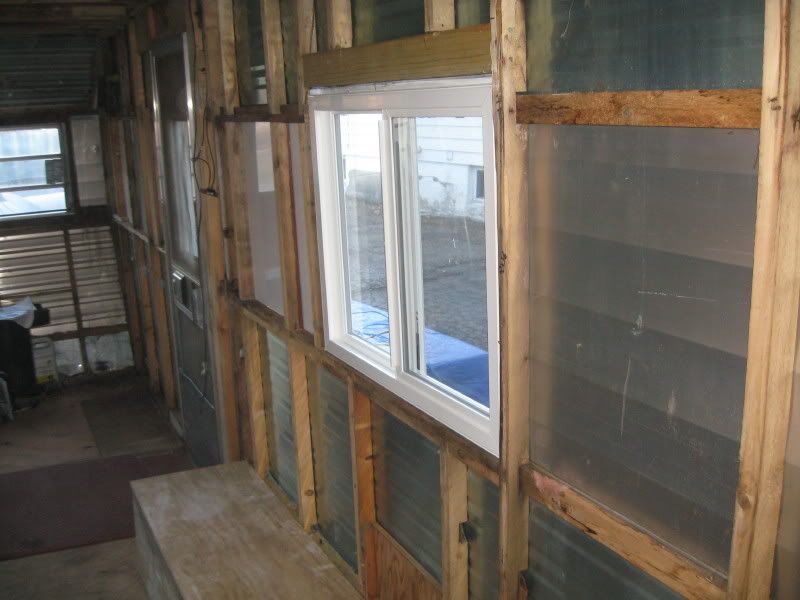
Tomorrow, I'll be replacing the 72" front window and will then move on to the wiring. The existing Precision Dynamics converter tested to be OK and has a solid state battery charger so I will use that for the DC. I am upgrading the older 30 amp service to 50 amp. If there's interest, I can post some more pictures up of the restoration, as I progress, and am always open to any ideas from others.
FWIW, I am going with a Western motif for the interior and have already renamed my baby, "The Cowboy/Hilton".
Edit: Pictures in this thread are unviewable because of Photobucket's recent change in Terms of Service. I plan to migrate to a different hosting site and to repair the images. Please, be patient, as there are many images in this thread.
Edit: Anyone wanting to view images can download this browser extension:Browser extension. It makes all the images in this thread viewable.
I purchased this 1971 Starcraft-Wanderstar from a local chap with a special purpose in mind: Gutting out the interior to insulate and make comfrotable for working stiffs like myself and, in particular, for those doing work-camping in the upper Midwest. My criteria was: a name brand with solid fame construction, a body that could be worked with (no accident damage, and good running gear (wheels, tires, bearings, and hitch, etc.) I also focused my purchase towards a TT from 19'->26'. I have a Ford F-250 4x4, CC with trailer and tow package. Pictures of "The Hilton" (named and painted by a previous owner) as bought:
I am currently still working on the Hilton and have about three weeks into it, so far. I am keeping a pictorial work log and will share most of it if others are interested. I have totally gutted the inside and am discarding most of the mechanicals, along with replacing and eliminating windows, repairing water-damaged framing (all of the wall top plates and half of the studs), relocating most of the plumbing, replacing all of the wiring, and installing a completely different decorative style.
To give an idea of what I found after gutting out the inside, here is a picture of the driver's side and the wheel well:
Here is that same area after reconstruction, the new wheel well frame is skinned with 16 ga. steel sheet, inside, and sprayed with truck bed liner. The frame is insulated and there is a thermal break between any out side joining surfaces and the inside sheeting.
Two of the most cantankerous aspects have been the replacement of the top wall plates and aluminum trim rail and removal of the floor to insulate. The major obstacle to the first is the amount of various goop that was used by previous owners to stop water intrusion. That, and the thousands of clutch drive screws and staples that were removed. The basic carpentry was simple, I replaced the rotten wood with pressure treated fir and, after a day with a grinder fitted with a steel wire wheel to clean the trim rail, the surfaces were all sealed, stapled, and screwed back together.
This picture shows the new top plates and the rafter reinforcement I thought was necessary:
While diving into the wheel well repair I noticed the floor had deteriorated under the water heater. Closer examination showed that the 1 1/2" space underneath the floor was uninsulated, excepting the 1/2" Buildrite on top of the aluminum belly skin. I pulled all of the plywood and installed 1 1/2" of extruded polystyrene in that space:
I've replaced two of the three windows I planned on and have removed two, all together. Those vacated jalousie windows are framed and will become insulated wall.
Tomorrow, I'll be replacing the 72" front window and will then move on to the wiring. The existing Precision Dynamics converter tested to be OK and has a solid state battery charger so I will use that for the DC. I am upgrading the older 30 amp service to 50 amp. If there's interest, I can post some more pictures up of the restoration, as I progress, and am always open to any ideas from others.
FWIW, I am going with a Western motif for the interior and have already renamed my baby, "The Cowboy/Hilton".
Edit: Pictures in this thread are unviewable because of Photobucket's recent change in Terms of Service. I plan to migrate to a different hosting site and to repair the images. Please, be patient, as there are many images in this thread.
Edit: Anyone wanting to view images can download this browser extension:Browser extension. It makes all the images in this thread viewable.
'03 F-250 4x4 CC
'71 Starcraft Wanderstar -- The Cowboy/Hilton
'71 Starcraft Wanderstar -- The Cowboy/Hilton
391 REPLIES 391
Options
- Mark as New
- Bookmark
- Subscribe
- Mute
- Subscribe to RSS Feed
- Permalink
- Report Inappropriate Content
Feb-20-2012 04:38 PM
U.P. BLDR wrote:
Darn that's a lot of cutting. I'm kind of in that stage right now too. I used the foil backed board though, it was the same price as pink board but a little higher R value and cuts like butter with a pocket knife. Still takes a lot of time though.
Oh yeah, no trouble cutting the stuff but measuring each piece takes the time. What you can't see in the oictures above are the gussets on eaach end of every rafter and the original pieces of 1/4" plywood gussets that were nailed, midspan, to the rafters. All of that needed to be cut around to install the foam board. I saw that on your Sunlte, you've installed new, solid rafters. That should make for a very solid roof and allow easier installation of the foam board.
Today, I jacked the roof up around the shower stall and installed a 4 mil. poly vapor barrier. In this picture, I've removed the jacking posts to get everything stapled.
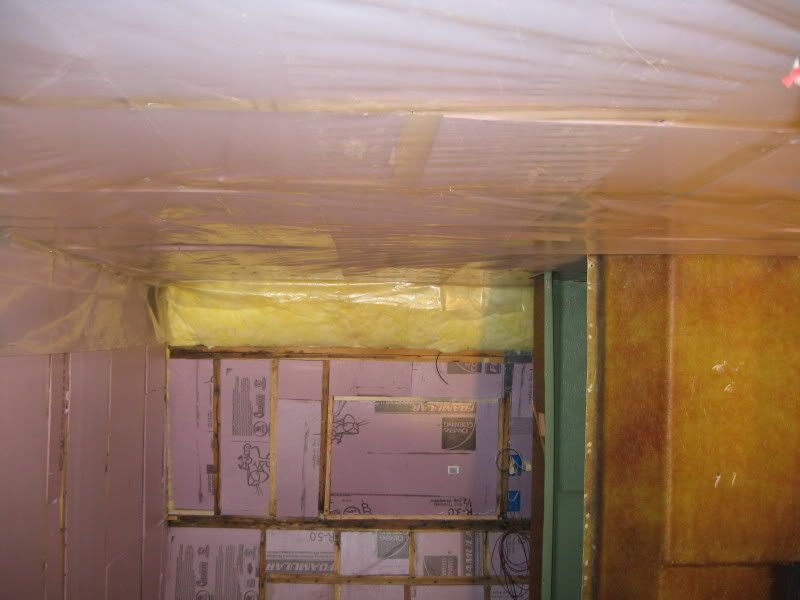
I took some measurements while I had the stall in situ because I am contemplating stapling some 1/4" fan fold foam board to the ceiling and the shower stall is too high (or the roof too low) to accomodate that. I may forgo that for the ceiling because the headroom is only 6'3" and I'm 6'2" so adding another 1/4" may be a cap-scraper. I'll sleep on it.
'03 F-250 4x4 CC
'71 Starcraft Wanderstar -- The Cowboy/Hilton
'71 Starcraft Wanderstar -- The Cowboy/Hilton
Options
- Mark as New
- Bookmark
- Subscribe
- Mute
- Subscribe to RSS Feed
- Permalink
- Report Inappropriate Content
Feb-20-2012 01:30 PM
Darn that's a lot of cutting. I'm kind of in that stage right now too. I used the foil backed board though, it was the same price as pink board but a little higher R value and cuts like butter with a pocket knife. Still takes a lot of time though.
1981 Sunline 17 1/2SB - under construction
2003 Toyota Tundra SR5 TRD 4x4 4.7lt
2003 Toyota Tundra SR5 TRD 4x4 4.7lt
Options
- Mark as New
- Bookmark
- Subscribe
- Mute
- Subscribe to RSS Feed
- Permalink
- Report Inappropriate Content
Feb-19-2012 11:39 AM
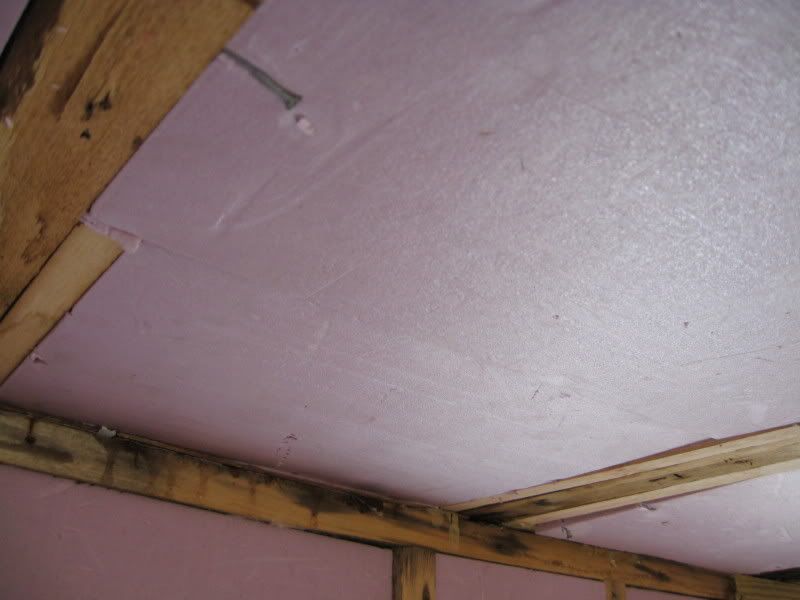
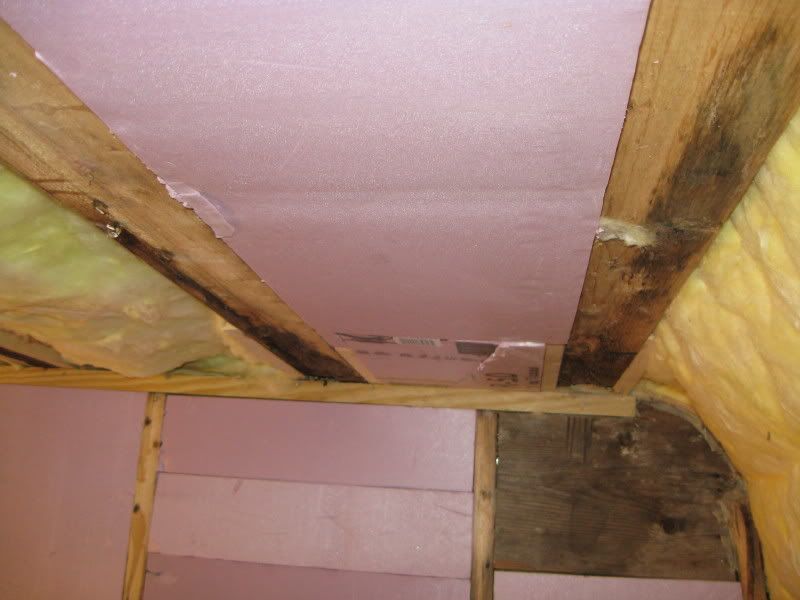
I was finally able to finish the ceiling insulation. Man, what a chore, if I was to do it agin, I'd buy the spray foam kit and save myself about thirty hours of cutting and fitting.

There are at least 8 pieces in each rafter bay and I recut a few of the ceiling pieces that are inside the rafter gussets, using 1/2" and 1" foam board. A few of these spots were impossible to get two 1" pieces to fit. All of the pieces are friction fit but I did use a couple of nails to hold a few panels in their spot.
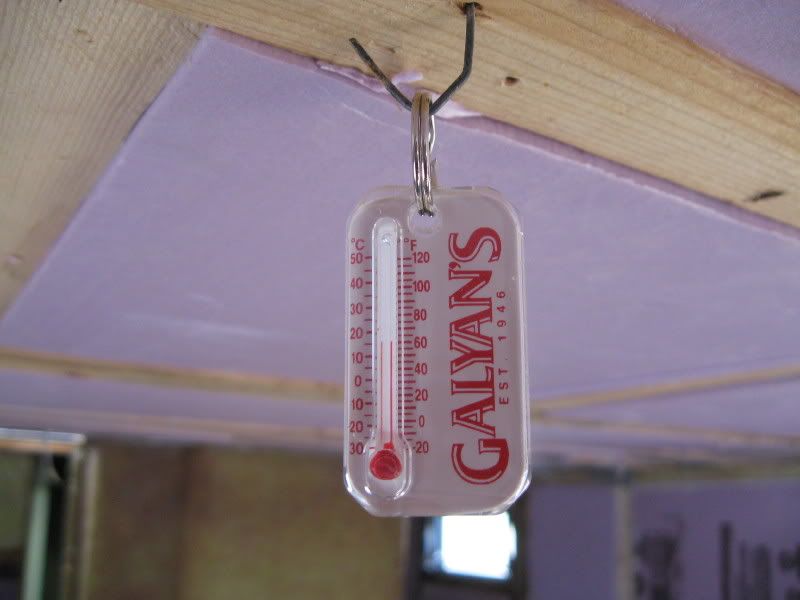
The really good news is that I ran the heater for an hour, this morning, it read 15 f. This afternoon, with no active heating except the sun, the temp stabilised at 60f., 40f. ambient.
Now, what to do with the waste?
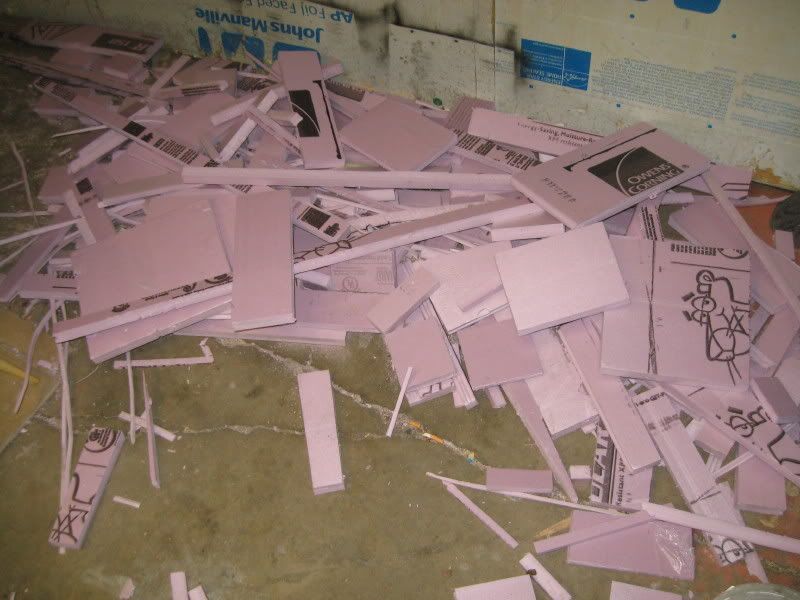
I'll be gong back in armed with foam adhesive and a can of expanding foam to get any cracks that remain.
There are at least 8 pieces in each rafter bay and I recut a few of the ceiling pieces that are inside the rafter gussets, using 1/2" and 1" foam board. A few of these spots were impossible to get two 1" pieces to fit. All of the pieces are friction fit but I did use a couple of nails to hold a few panels in their spot.
The really good news is that I ran the heater for an hour, this morning, it read 15 f. This afternoon, with no active heating except the sun, the temp stabilised at 60f., 40f. ambient.
Now, what to do with the waste?
I'll be gong back in armed with foam adhesive and a can of expanding foam to get any cracks that remain.
'03 F-250 4x4 CC
'71 Starcraft Wanderstar -- The Cowboy/Hilton
'71 Starcraft Wanderstar -- The Cowboy/Hilton
Options
- Mark as New
- Bookmark
- Subscribe
- Mute
- Subscribe to RSS Feed
- Permalink
- Report Inappropriate Content
Feb-17-2012 05:52 AM
U.P. BLDR wrote:
Westend I can totally relate to the pace of these trailer renovations. Being a building contractor I'm used to knocking jobs out quick, but holy cow working on my TT is taking forever it seems. One thing always leads to another. No place to buy anything camper related around here either so I'm often waiting for internet buys to get here. Good thing is I won't need it until May which give me plenty of time to finish. Keep up the good work!
Yeah, the space limitations and scheduling/planning change the game, don't they? I could have sided a couple of houses in the time I have into insulating the Hilton.
Since I've worked off blueprints for years, I took the time to draw up framing and electrical prints. Those were soon sitting inside a folder and I haven't looked at them but a couple of times,lol. I'm just hoping that I haven't forgotten a crucial detail. As it is, a lot of the work is beyond what Starcraft had built, originally, and I'm hoping it makes this trailer more livable. The Internet is just a real Godsend, IMO. This Forum and a few others have helped me muddle through a few issues and, with a lot of surfing, have turned up the parts I'm needing. PPL Motorhomes has a fairly broad range of parts and I scored the blackwater tank gaskets from them. Delivery time was very short, a few days, IIRC. Most of the other generic pieces I've either had in storage or was able to source through local sellers. I've also been lucky fixing what was original, the vent fan and water pump were easily repaired.
I'm hoping that I get my current work schedule caught up by the end of the weekend so I can get back to trailer work and am able to make some decent progress. Keep the faith, UP! Maybe we'll be parked next to each other this summer.;)
'03 F-250 4x4 CC
'71 Starcraft Wanderstar -- The Cowboy/Hilton
'71 Starcraft Wanderstar -- The Cowboy/Hilton
Options
- Mark as New
- Bookmark
- Subscribe
- Mute
- Subscribe to RSS Feed
- Permalink
- Report Inappropriate Content
Feb-16-2012 10:54 AM
Westend I can totally relate to the pace of these trailer renovations. Being a building contractor I'm used to knocking jobs out quick, but holy cow working on my TT is taking forever it seems. One thing always leads to another. No place to buy anything camper related around here either so I'm often waiting for internet buys to get here. Good thing is I won't need it until May which give me plenty of time to finish. Keep up the good work!
1981 Sunline 17 1/2SB - under construction
2003 Toyota Tundra SR5 TRD 4x4 4.7lt
2003 Toyota Tundra SR5 TRD 4x4 4.7lt
Options
- Mark as New
- Bookmark
- Subscribe
- Mute
- Subscribe to RSS Feed
- Permalink
- Report Inappropriate Content
Feb-16-2012 05:48 AM
hilandfrog wrote:
"...Two things that I forgot were receptacles dedicated for a refrigerator and a microwave..."
This is why I like reading others postings:)
While I haven't started on wiring yet, reading your postings reminded me to make plans for the Fantastic fan wires and an outside GFCI.
I like the look of those used cabinets... I guess the weight would be the thing holding me back?
We're getting ready for a little ski trip to CO, leaving later today, back next week.
I'm already wanting to tinker w/ Diddums but there are things to be done before I can leave.
I expect when I get back you'll be slapping in Luan walls and getting ready for cabinets:D
Repo
Hey, you're on the road, good deal! Yeah, even with pre-planning, I forgot a few things. The other wrinkle is where in the process do I add something that is a necesity? Trying to be as efficient about the total process means that I have to keep a lot of mental-plates spinning. For instance: I will need to add a blackwater tank vent since I vacated the original. It will be more efficient to do this when the luan is on the ceiling because I can cut the hole through all of the material instead of trying to locate the hole in four layers of material.
I'm still on the fence about the salvaged cabinets. If anything, I may build another face frame and use a set of leaded glass cabinet doors that I have. It would kind of keep to the vintage western look I'm after.
One of the detriments to cabinets with solid doors is that they become a cold-sink, I've found. This can be just an inconvenience or it can become a real pain. If your fresh water tank is inboard (like mine), enclosing it in cabinetry without a heat source may lead to very cold water or even freeze-up. I've camped in subzero conditions where all of the liquid foodstuff that was packed into a compartment turned into ice. These closed compartments also tend to keep the interior space colder, I've found. I did find a solution to this, recently. At a visit to a textile outlet, I found a plastic wall covering material that looked very sturdy and would make for a good surface for inboard compartment fronts. It has a weave that should let heated air pass through into the compartments and still look attractive. I can build frames for this material and staple it onto the back of the frame. This should allow to eliminate some of the cold spots, eliminate the weight of a solid door or front, and be easy to build. We'll see.
I have about half or better of the ceiling polystyrene board in place. It is slow-going, there are 8-10 pieces in each cavity and there are 15 rafter cavities. That is 120-150 pieces of pink board in the ceiling. The good news is that my utility knife skills are getting really good and the Hilton is getting very quiet.:D
'03 F-250 4x4 CC
'71 Starcraft Wanderstar -- The Cowboy/Hilton
'71 Starcraft Wanderstar -- The Cowboy/Hilton
Options
- Mark as New
- Bookmark
- Subscribe
- Mute
- Subscribe to RSS Feed
- Permalink
- Report Inappropriate Content
Feb-15-2012 06:06 AM
"...Two things that I forgot were receptacles dedicated for a refrigerator and a microwave..."
This is why I like reading others postings:)
While I haven't started on wiring yet, reading your postings reminded me to make plans for the Fantastic fan wires and an outside GFCI.
I like the look of those used cabinets... I guess the weight would be the thing holding me back?
We're getting ready for a little ski trip to CO, leaving later today, back next week.
I'm already wanting to tinker w/ Diddums but there are things to be done before I can leave.
I expect when I get back you'll be slapping in Luan walls and getting ready for cabinets:D
Repo
05 Tundra 4x4
1977' Road Ranger, Diddums is in action.
1977' Road Ranger, Diddums is in action.
Options
- Mark as New
- Bookmark
- Subscribe
- Mute
- Subscribe to RSS Feed
- Permalink
- Report Inappropriate Content
Feb-13-2012 06:32 PM
Your first post was barely a month ago, that is an impressive amount of work!
Its kind of ugly but at least its not aerodynamic.
Options
- Mark as New
- Bookmark
- Subscribe
- Mute
- Subscribe to RSS Feed
- Permalink
- Report Inappropriate Content
Feb-10-2012 10:30 PM
Thanks guys, I'm trying to do a good job on this.
UP, I saw your thread about the Sunlite restoration and I'll definitely agree, more work just seems to pop up. I knew that this TT had major issues so I planned to gut the whole thing at the start. What I didn't estimate correctly was the pace of the work, it is not like building, say, a frame house, where there is abundant room and most of the pieces are similar. Also, a guy has to keep convenience in mind, i.e. how is one going to use this part of the TT and what do I do to make sure that nothing else is in it's way. I'm somewhat ahead of the game, in that, my wife, the Polish Princess, has no input as to amenities and this build is strictly a "guy thing". What woman would like to have a saddle stool in front of her dinette, lol?
UP, I saw your thread about the Sunlite restoration and I'll definitely agree, more work just seems to pop up. I knew that this TT had major issues so I planned to gut the whole thing at the start. What I didn't estimate correctly was the pace of the work, it is not like building, say, a frame house, where there is abundant room and most of the pieces are similar. Also, a guy has to keep convenience in mind, i.e. how is one going to use this part of the TT and what do I do to make sure that nothing else is in it's way. I'm somewhat ahead of the game, in that, my wife, the Polish Princess, has no input as to amenities and this build is strictly a "guy thing". What woman would like to have a saddle stool in front of her dinette, lol?
'03 F-250 4x4 CC
'71 Starcraft Wanderstar -- The Cowboy/Hilton
'71 Starcraft Wanderstar -- The Cowboy/Hilton
Options
- Mark as New
- Bookmark
- Subscribe
- Mute
- Subscribe to RSS Feed
- Permalink
- Report Inappropriate Content
Feb-10-2012 12:21 PM
Looks great man! I'm currently doing the same thing to a 1981 Sunlite 17.5. Lots of work. Amazing the******you find when you pull one of these apart.
1981 Sunline 17 1/2SB - under construction
2003 Toyota Tundra SR5 TRD 4x4 4.7lt
2003 Toyota Tundra SR5 TRD 4x4 4.7lt
Options
- Mark as New
- Bookmark
- Subscribe
- Mute
- Subscribe to RSS Feed
- Permalink
- Report Inappropriate Content
Feb-10-2012 11:54 AM
Thanks for the update. Very interesting. Reminds me of the rebuild I did in the 70's when my Tag-Along rotted out in the back & I had to rebuild it. Good job.
2011 Chevy 3500 HD LTZ Duramax/Allison Crew Cab Long Box DRW
B&W Turnover Ball with Companion
2012 Keystone Cougar 293 SAB 5er
USAF 1968 - 1972 Viet Nam '71 - '72
B&W Turnover Ball with Companion
2012 Keystone Cougar 293 SAB 5er
USAF 1968 - 1972 Viet Nam '71 - '72
Options
- Mark as New
- Bookmark
- Subscribe
- Mute
- Subscribe to RSS Feed
- Permalink
- Report Inappropriate Content
Feb-10-2012 10:37 AM
My work schedule has been getting in my way for the past couple of weeks but someone postponed on me, today so I dove back in to get some more done.
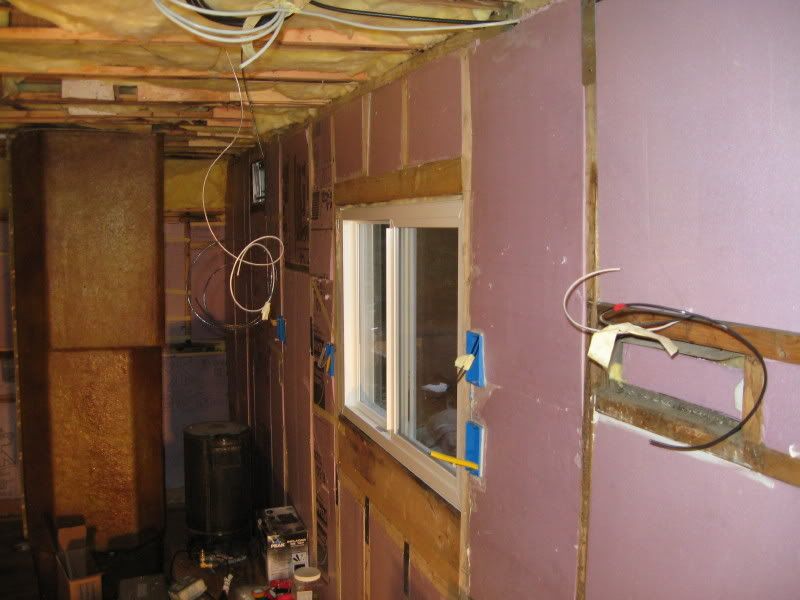
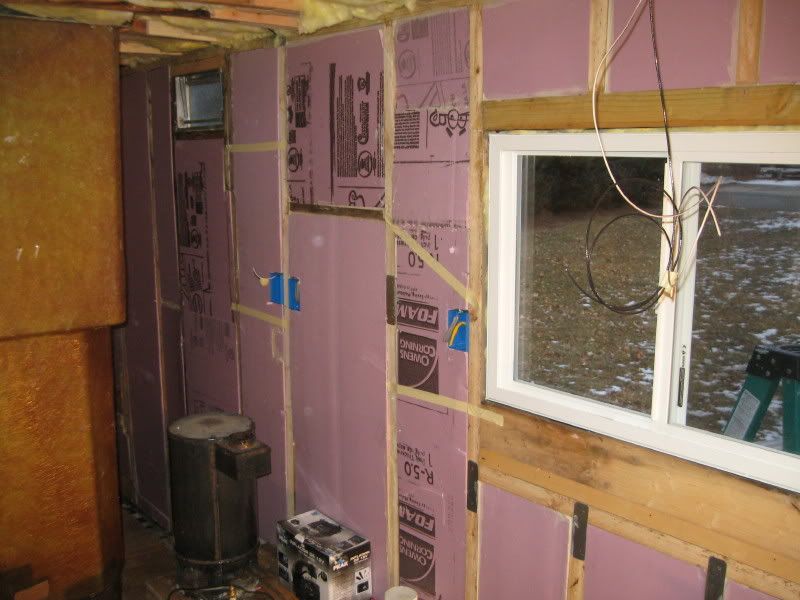
I completed the polystyrene installation in the walls, last week. By the last count there are over 100 individual pieces between the studs, very few of them that were parallel on the sides, some as much as 3/4" out so every cavity was measured and a piece cut so that there are very few gaps. Whatever crack remains is filled with adhesive so that there is no airflow between the framing and the insulation board.
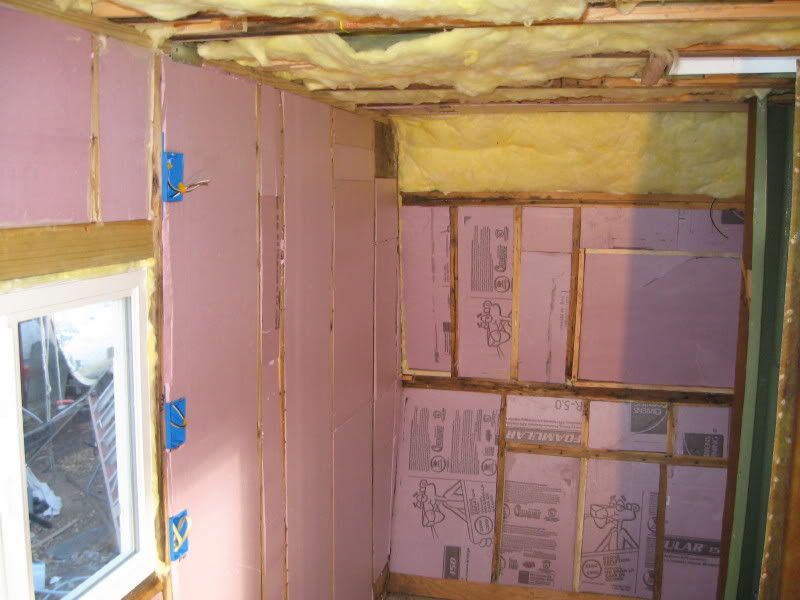
I've also started on the ceiling where two layers of the same 1" board are installed below 1" of fiberglass batt.
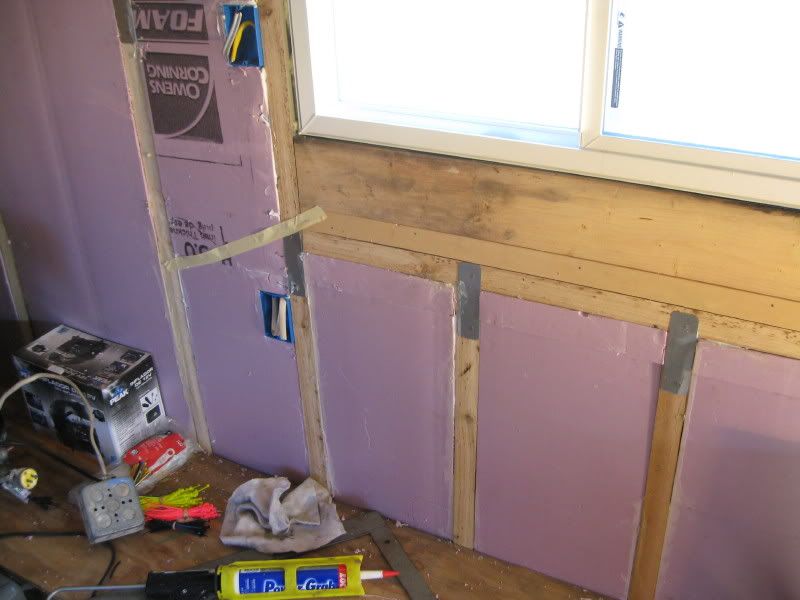
During the work, I've had time to think how I'll be using the Hilton and what will be going where. Two things that I forgot were receptacles dedicated for a refridgerator and a microwave. One outlet is next to the vent hood and another under the countertop. I could have used the existing recepatacles I've installed but I thought dedicated branches for these would be best and I sized each of them to 20 amps.
Vent hood location:
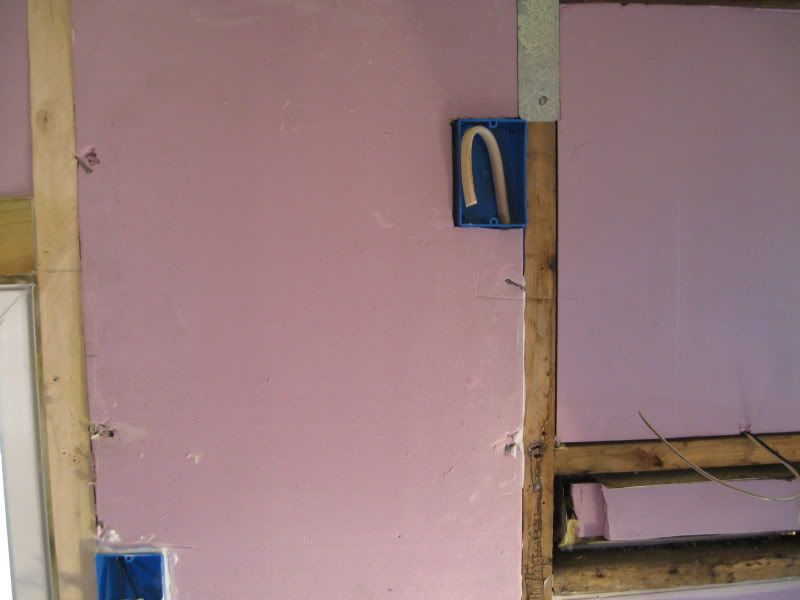
Under countertop location:
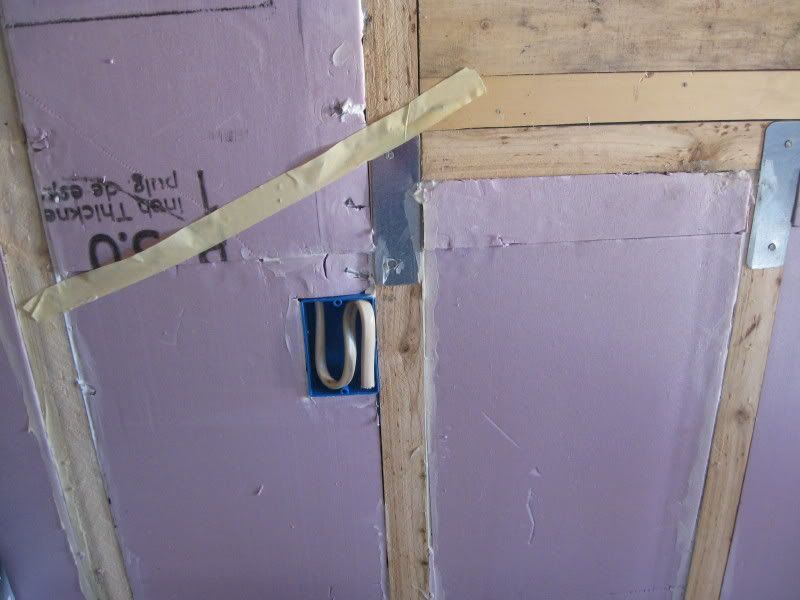
After wiring these locations the walls were buttoned back up and all is pink again:
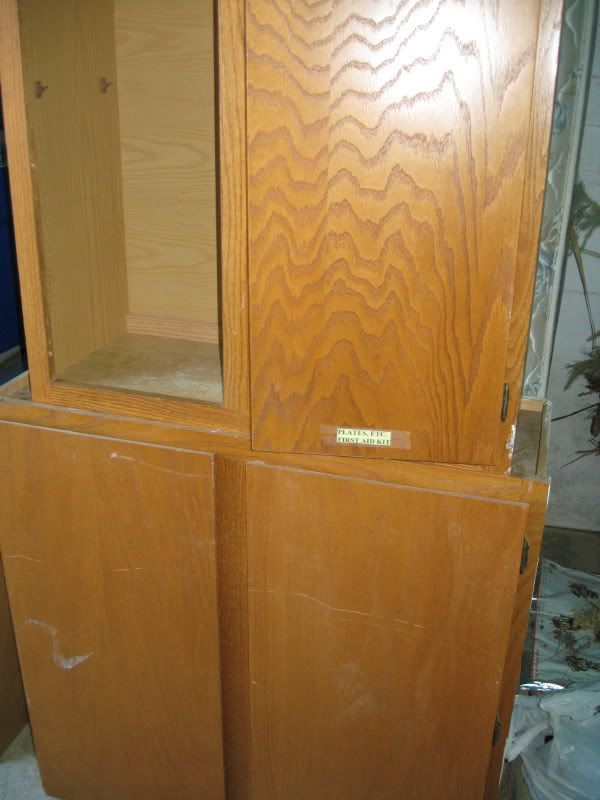
If anyone hasn't figured out that I'm a dedicated scrounger, I hereby confess. I'm always on the lookout for discarded materials and I ran across these cabinets, last week. Nothing terribly wrong with them ( one has one of the doors removed but I have it, along with the shelves)and I may install them later.
I completed the polystyrene installation in the walls, last week. By the last count there are over 100 individual pieces between the studs, very few of them that were parallel on the sides, some as much as 3/4" out so every cavity was measured and a piece cut so that there are very few gaps. Whatever crack remains is filled with adhesive so that there is no airflow between the framing and the insulation board.
I've also started on the ceiling where two layers of the same 1" board are installed below 1" of fiberglass batt.
During the work, I've had time to think how I'll be using the Hilton and what will be going where. Two things that I forgot were receptacles dedicated for a refridgerator and a microwave. One outlet is next to the vent hood and another under the countertop. I could have used the existing recepatacles I've installed but I thought dedicated branches for these would be best and I sized each of them to 20 amps.
Vent hood location:
Under countertop location:
After wiring these locations the walls were buttoned back up and all is pink again:
If anyone hasn't figured out that I'm a dedicated scrounger, I hereby confess. I'm always on the lookout for discarded materials and I ran across these cabinets, last week. Nothing terribly wrong with them ( one has one of the doors removed but I have it, along with the shelves)and I may install them later.
'03 F-250 4x4 CC
'71 Starcraft Wanderstar -- The Cowboy/Hilton
'71 Starcraft Wanderstar -- The Cowboy/Hilton
Options
- Mark as New
- Bookmark
- Subscribe
- Mute
- Subscribe to RSS Feed
- Permalink
- Report Inappropriate Content
Feb-02-2012 05:48 PM
Thanks, crab, I'm having a lot of fun with it. Stay tuned for putting some Cowboy into the Hilton, that will be along in a couple of weeks.
'03 F-250 4x4 CC
'71 Starcraft Wanderstar -- The Cowboy/Hilton
'71 Starcraft Wanderstar -- The Cowboy/Hilton
Options
- Mark as New
- Bookmark
- Subscribe
- Mute
- Subscribe to RSS Feed
- Permalink
- Report Inappropriate Content
Feb-02-2012 02:45 PM
Wow, that`s an impressive project you have going there! Lots of work but you will have a custom built one of a kind 4 season unit when ya get her done! Best of luck finishing the job.
2010 Jayco 28BHS
2004 Chevy 1500 Ext.Cab 5.3L, 3.73, Bilsteins, Timbren SES
Reese Dual Cam
Prodigy P3
2004 Chevy 1500 Ext.Cab 5.3L, 3.73, Bilsteins, Timbren SES
Reese Dual Cam
Prodigy P3
Options
- Mark as New
- Bookmark
- Subscribe
- Mute
- Subscribe to RSS Feed
- Permalink
- Report Inappropriate Content
Feb-02-2012 02:27 PM
Thanks all for the good wishes and good thoughts, everyone!
I started in on the polystyrene install and have two sides complete. There are a lot of little pieces and a lot of carving to get the styrene board around wires, staples, framework, etc. The good news is at 30-40 f., I only run the electric heater for a couple of hours a day and the halogen work light along with the new insulation keeps it nice and warm inside. It's actually too hot if I leave the heater run for more than two hours, lol.
The white caulking material is a sealant that I had in the storage shed, I tried to fill every little crack to seal up the wall.
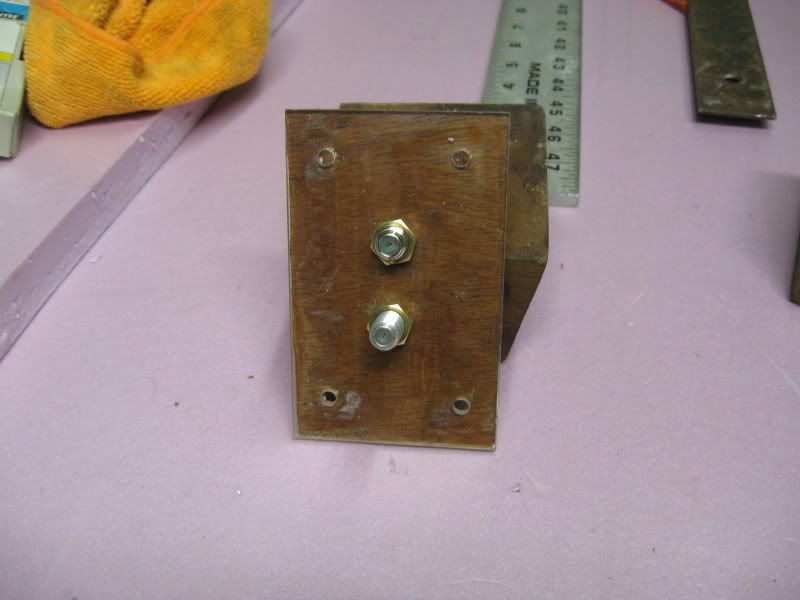
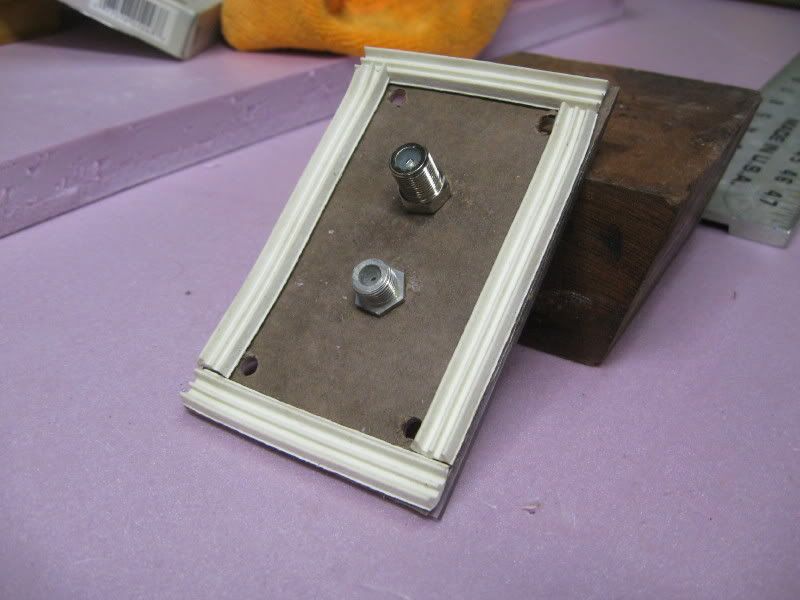
Along the driver's side wall was the original antenna inlet, a twin lead connector. Real cowpokes don't use no stinkin' twin lead so I grabbed some stuff and here's what I ended up with, two coaxial entrances, one for stereo FM and one for TV:
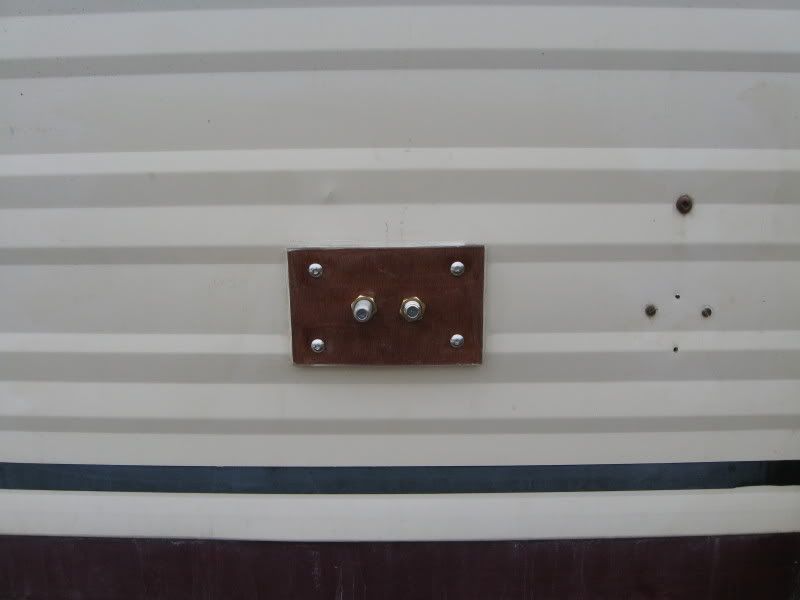
The inside terminations:
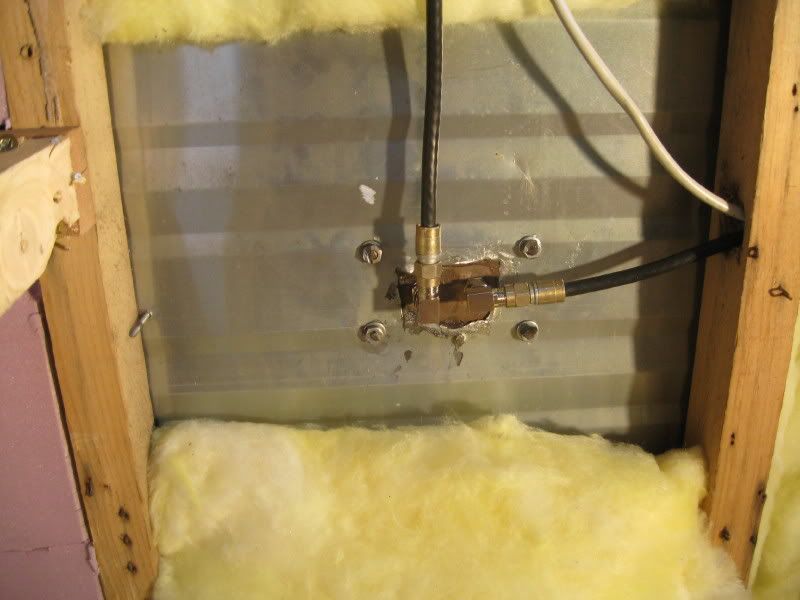
What I ended up using for this was a scrap piece of Lexan and I glued a piece of mahogany venner onto the back of the plate. I attached some weather strip tape, a bead of silicone, and bolted it through the skin of the trailer.
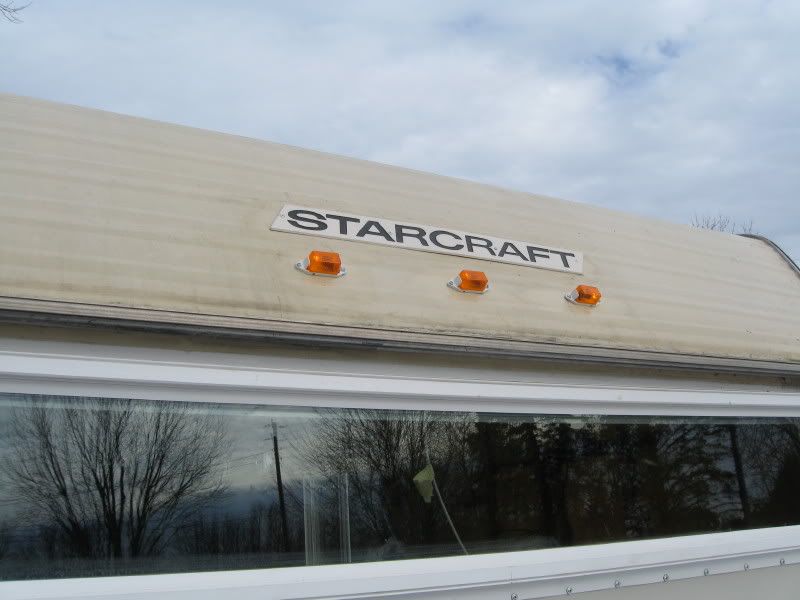
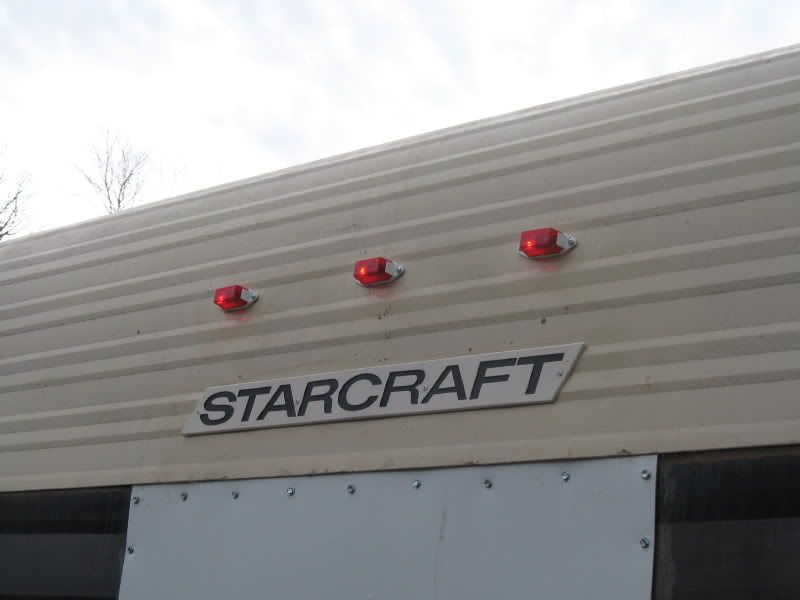
Yesterday was nice and sunny so I thought I'd finish up on the clearance lights, the logo signs and reattach the taillights, since the PO thought a sheetmetal screw or two would do the job---not. I made some brackets and through bolted the light cases into the brackets.
Back to the insulating, I think I'm starting to see pink dots, lol.;)
I started in on the polystyrene install and have two sides complete. There are a lot of little pieces and a lot of carving to get the styrene board around wires, staples, framework, etc. The good news is at 30-40 f., I only run the electric heater for a couple of hours a day and the halogen work light along with the new insulation keeps it nice and warm inside. It's actually too hot if I leave the heater run for more than two hours, lol.
The white caulking material is a sealant that I had in the storage shed, I tried to fill every little crack to seal up the wall.
Along the driver's side wall was the original antenna inlet, a twin lead connector. Real cowpokes don't use no stinkin' twin lead so I grabbed some stuff and here's what I ended up with, two coaxial entrances, one for stereo FM and one for TV:
The inside terminations:
What I ended up using for this was a scrap piece of Lexan and I glued a piece of mahogany venner onto the back of the plate. I attached some weather strip tape, a bead of silicone, and bolted it through the skin of the trailer.
Yesterday was nice and sunny so I thought I'd finish up on the clearance lights, the logo signs and reattach the taillights, since the PO thought a sheetmetal screw or two would do the job---not. I made some brackets and through bolted the light cases into the brackets.
Back to the insulating, I think I'm starting to see pink dots, lol.;)
'03 F-250 4x4 CC
'71 Starcraft Wanderstar -- The Cowboy/Hilton
'71 Starcraft Wanderstar -- The Cowboy/Hilton


